Virtual Machine Configuration Guide
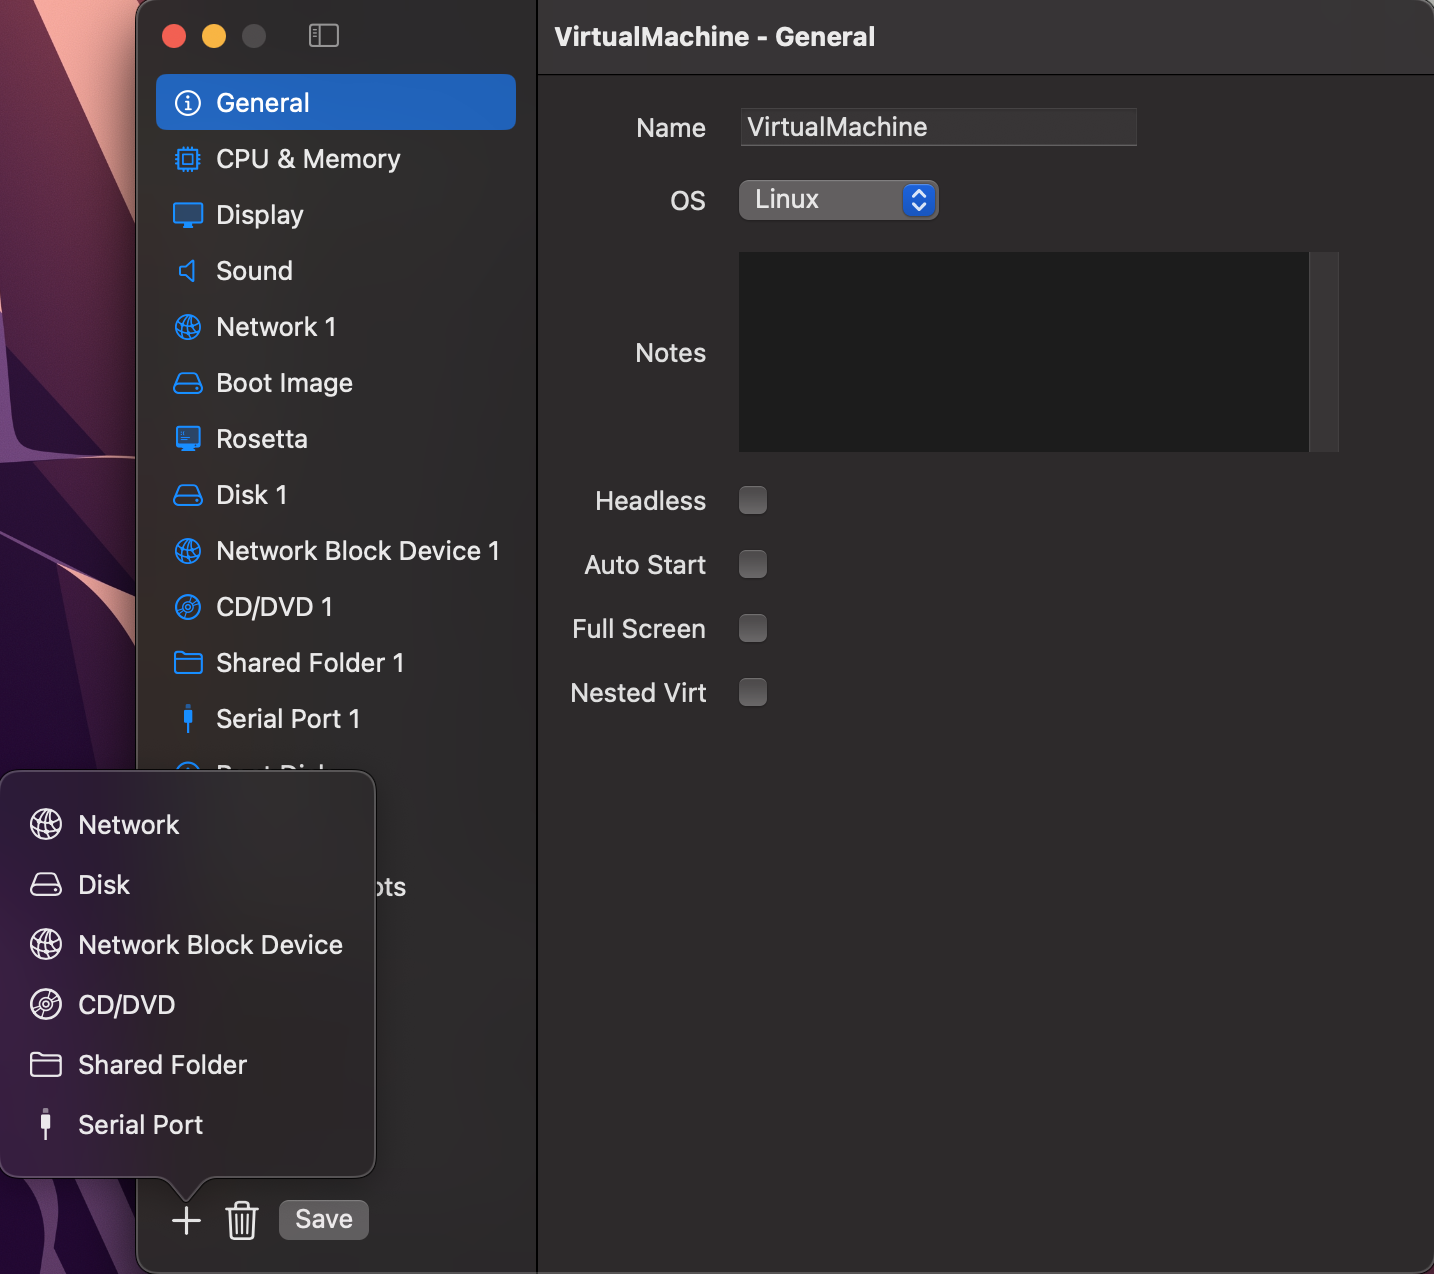
When you click the + button in the Control Center of VirtualProg, you are presented with a comprehensive configuration screen to set up a new virtual machine. The configuration screen is organized into several sections accessible via a sidebar. Below is a description of each section along with a link to its respective documentation file.
📸 Screenshot:
Sidebar Sections
1. General
Configure the name, description, operating system type (Linux or macOS), headless mode, auto-start, full screen behavior, and nested virtualization options.
2. CPU & Memory
Set the number of virtual CPU cores, memory size (in MB), and enable memory ballooning for better memory management.
3. Display
Configure virtual display resolution, DPI, and whether to use host display or force resolution.
4. Sound
Enable or disable virtual audio input and output devices.
5. Network
Add and configure virtual network adapters, choose network type (NAT, bridged, etc.), and set custom MAC addresses.
6. Disk
Add and configure virtual hard disks including size, interface type (VirtIO or NVME), caching and sync modes.
7. Network Block Device
Attach network-backed block devices using NBD URLs with optional timeout, read-only mode, and disk interface.
8. CD/DVD
Attach ISO images as virtual CD/DVD drives with interface options like USB or VirtIO.
9. Shared Folder
Mount host directories inside the guest with read-only options and custom mount names.
10. Serial Port
Add serial ports in console or file output mode. Useful for debugging and headless setups.
11. Boot Disk
Select the disk from which the virtual machine should boot, or set it to auto.
12. Security
Configure clipboard sharing, screenshot access, screen recording, VM password protection, and usage stats.
13. Auto Snapshots
Enable and schedule automatic snapshots of the VM for recovery or backup purposes.
14. Restore Image (macOS)
Choose a macOS IPSW restore image to use for macOS installations.
15. Input Devices (macOS)
Set the type of virtual keyboard and mouse (Mac or Legacy USB).
16. Boot Image (Linux)
Specify a Linux kernel and initial RAM disk for custom Linux booting.
17. Rosetta (Linux)
Enable Rosetta support for running x86_64 binaries on ARM-based macOS hosts.
Dynamic Configuration
At the bottom left of the configuration screen, you will find + and 🗑 Trash buttons:
-
Clicking the + button opens a menu that lets you add additional components to your VM, including:
-
The 🗑 Trash button allows you to remove any of the above items that you've added.
- Additionally, the Display section can be deleted, which is especially useful when configuring a virtual machine to run in headless mode (without a graphical user interface).
These controls make it easy to tailor your VM's configuration to exactly what you need.