Disk Configuration
Manage virtual hard disks for your virtual machine.
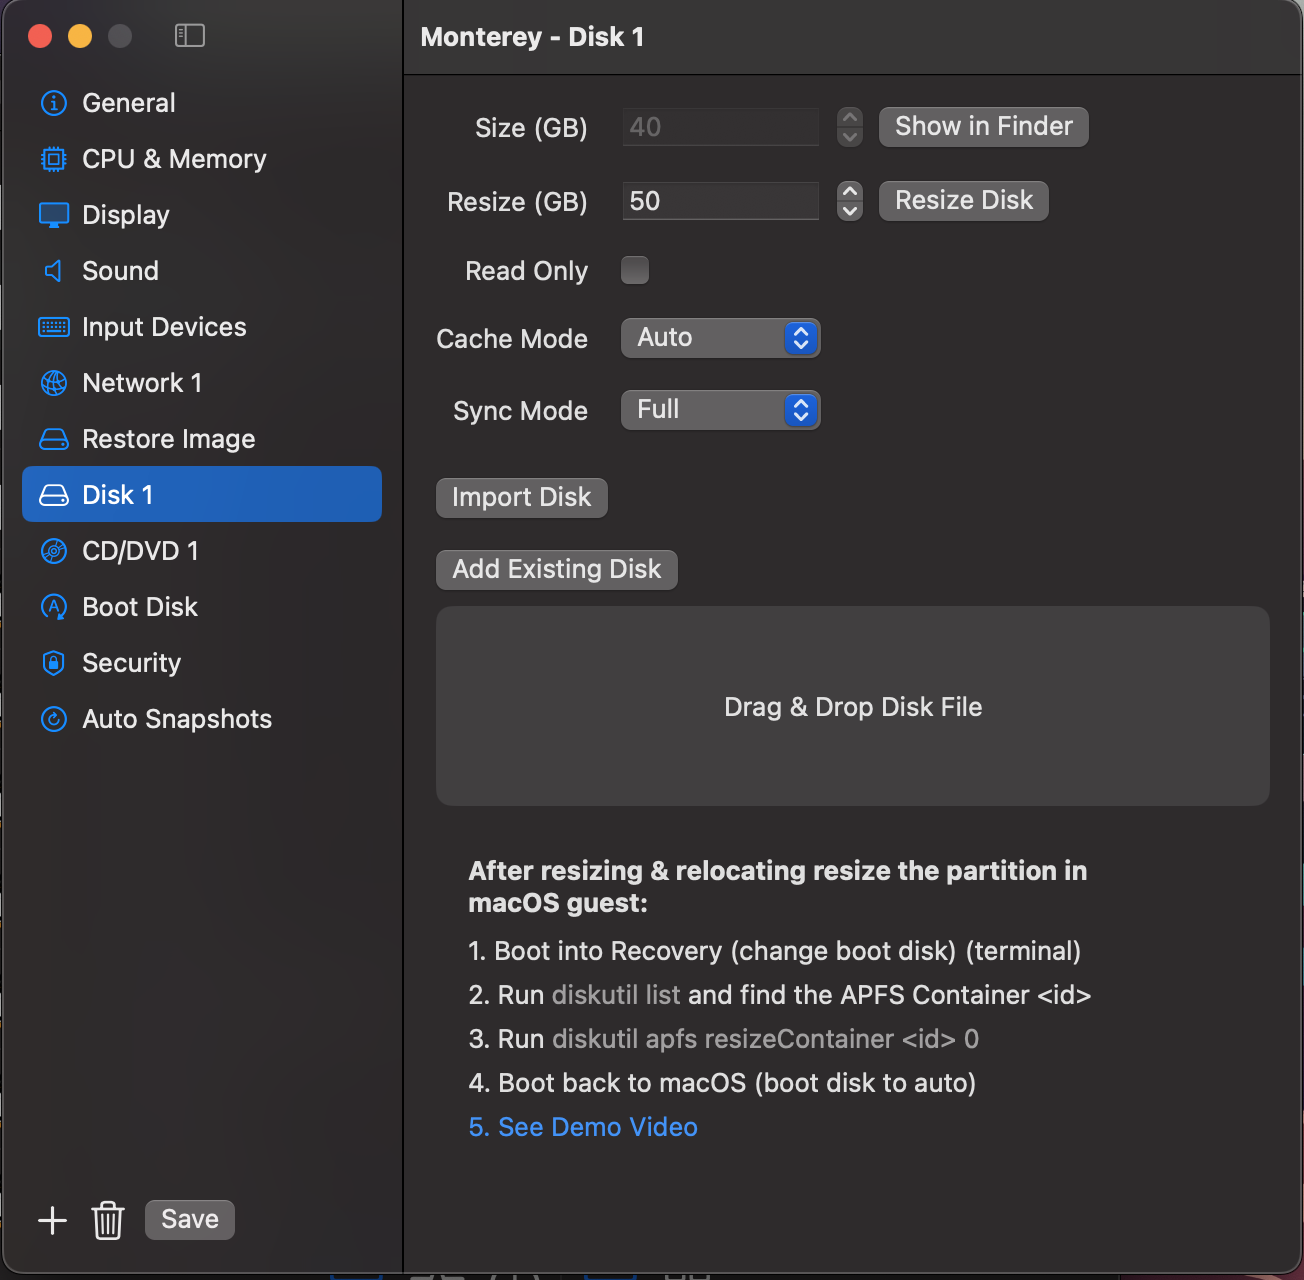
📸 Screenshot:
Fields
- Size (GB): Displays the original size of the virtual disk.
- Interface: Choose VirtIO or NVME (Linux only)
- Resize (GB): Allows you to specify a new size to expand the disk.
- Resize Disk: Applies the new size. (Edit only)
- Read Only: Mount the disk in read-only mode.
- Disk Type: Choose between Fixed and Dynamic (Tahoe Onwards).
Fixed: Allocates the full specified disk size upfront.Dynamic: Allocates space as needed, allowing the disk to grow with stored content to optimize storage usage.
- Cache Mode: Choose between Auto, Cached, or Uncached.
Auto: Allows the virtualization framework to automatically determine whether to enable data caching.Cached: Enables data caching.None: Disables data caching.
- Sync Mode: Choose the disk synchronization behavior (
Full,FSync, orNone).Full: Synchronizes data to the permanent storage holding the disk image.FSync: Synchronizes data to the drive using the system’s best-effort synchronization mode.None: Disables data synchronization with the permanent storage.
- Show in Finder: Opens the disk file location in Finder.
- Import Disk: Import a new disk image into the VM bundle. (Edit only)
- Add Existing Disk: Attach an existing disk file (previously created or used with another VM).
- Drag & Drop: You can also drag a
.imgdisk file into the interface.
Resizing Guidance
For Linux Guests
- The disk will be resized as requested.
- You must then resize the partition from within the Linux guest using tools like
gpartedorparted.
For macOS Guests
- After resizing, VirtualProg helps relocate the Recovery partition to the end of the disk.
- You must then resize the APFS container from the macOS guest.
Steps:
- Boot into macOS Recovery (you may need to change the boot disk temporarily).
- Open Terminal and run: Find the APFS Container identifier.
- Resize it:
- Boot back to macOS (and set the boot disk to Auto if needed).
▶️ Watch this video demo for resizing both macOS and Linux disks: