Disk Configuration
Manage virtual hard disks for your virtual machine.
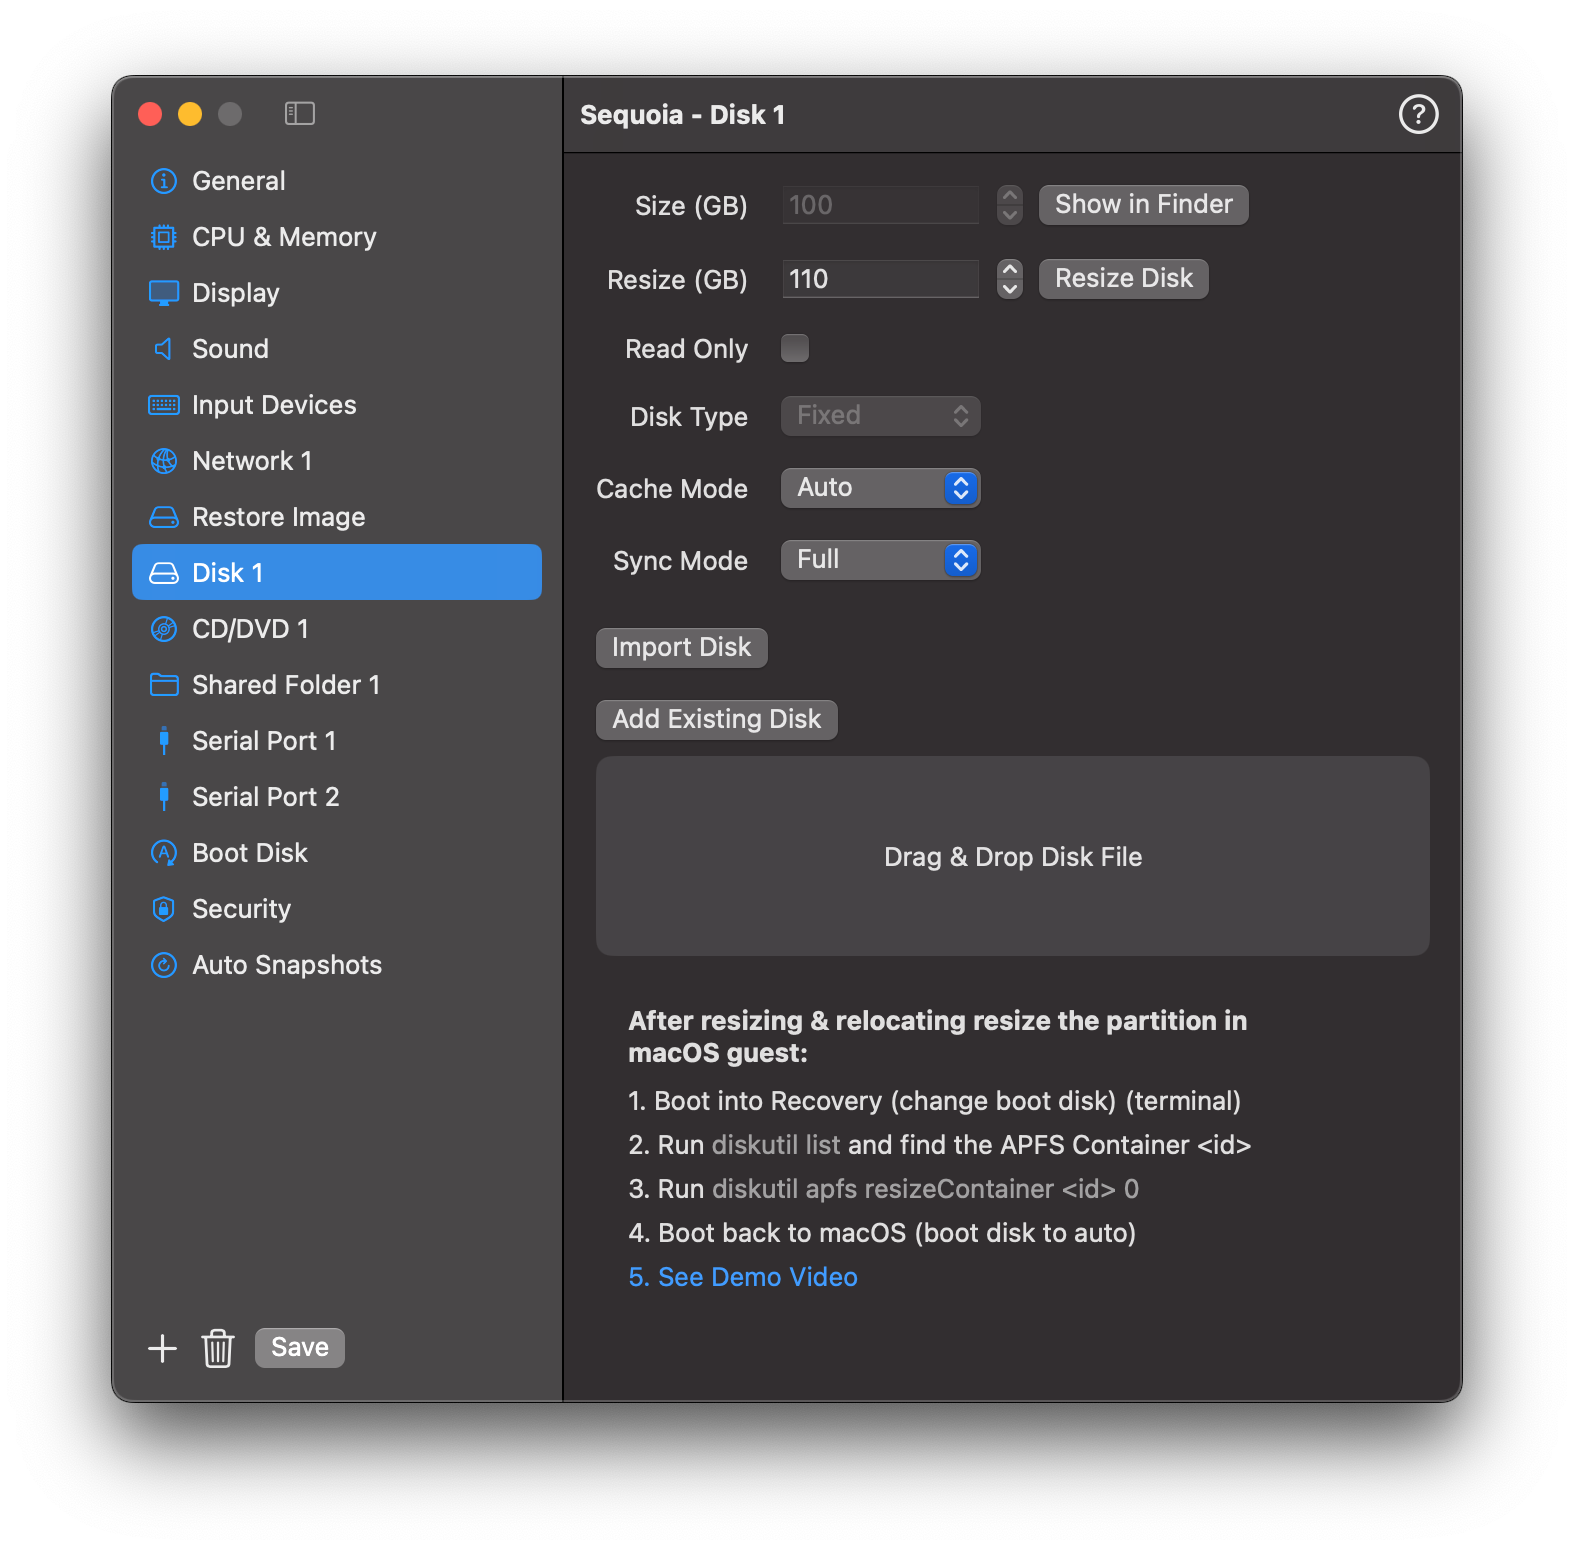
📸 Screenshot:
Fields
| Field | Description |
|---|---|
| Size (GB) | Displays the original size of the virtual disk. |
| Interface | Choose VirtIO or NVME (Linux only). |
| Resize (GB) | Specify a new size to expand the disk. |
| Resize Disk | Applies the new size. (Edit only) |
| Read Only | Mount the disk in read-only mode. |
| Disk Type | Choose between Fixed and Dynamic (Tahoe onwards). Fixed: Allocates the full specified disk size upfront. Dynamic: Allocates space as needed, growing with stored content to optimise storage usage. |
| Cache Mode | Controls data caching behaviour. Auto: Framework automatically determines whether to enable caching. Cached: Enables data caching. None: Disables data caching. |
| Sync Mode | Controls disk synchronisation behaviour. Full: Synchronises data to permanent storage holding the disk image. FSync: Synchronises using the system’s best-effort mode. None: Disables data synchronisation. |
| Show in Finder | Opens the disk file location in Finder. |
| Import Disk | Import a new disk image into the VM bundle. (Edit only) |
| Add Existing Disk | Attach an existing disk file previously created or used with another VM. |
| Drag & Drop | Drag a .img disk file directly into the interface to attach it. |
Resizing Guidance
For Linux Guests
- The disk will be resized as requested.
- You must then resize the partition from within the Linux guest using tools like
gpartedorparted.
For macOS Guests
- After resizing, VirtualProg automatically relocate(only for fixed disks) the Recovery partition to the end of the disk.
- If it is a dynamic disk, because of appstore sandbox restrictions we cannot automatically relocate the recovery partition. You have to manually move it to the end of the disk. Identify the path of the disk image using Show In Finder in the disk config screen. Download the RelocatePartition from Tools > Download Relocate Partition and run
- You must then resize the APFS container from the macOS guest.
Steps:
- Boot into macOS Recovery (you may need to change the boot disk in the config temporarily).
- Open Terminal and run: Find the APFS Container identifier.
- Resize it:
- Boot back to macOS (and set the boot disk to Auto if needed).
▶️ Watch this video demo for resizing both macOS and Linux disks: