Snapshots Timeline
The Snapshots Timeline window provides a chronological, visual history of all snapshots for a virtual machine — displayed as a scrollable timeline with alternating left/right cards around a central spine.
📸 Screenshot:
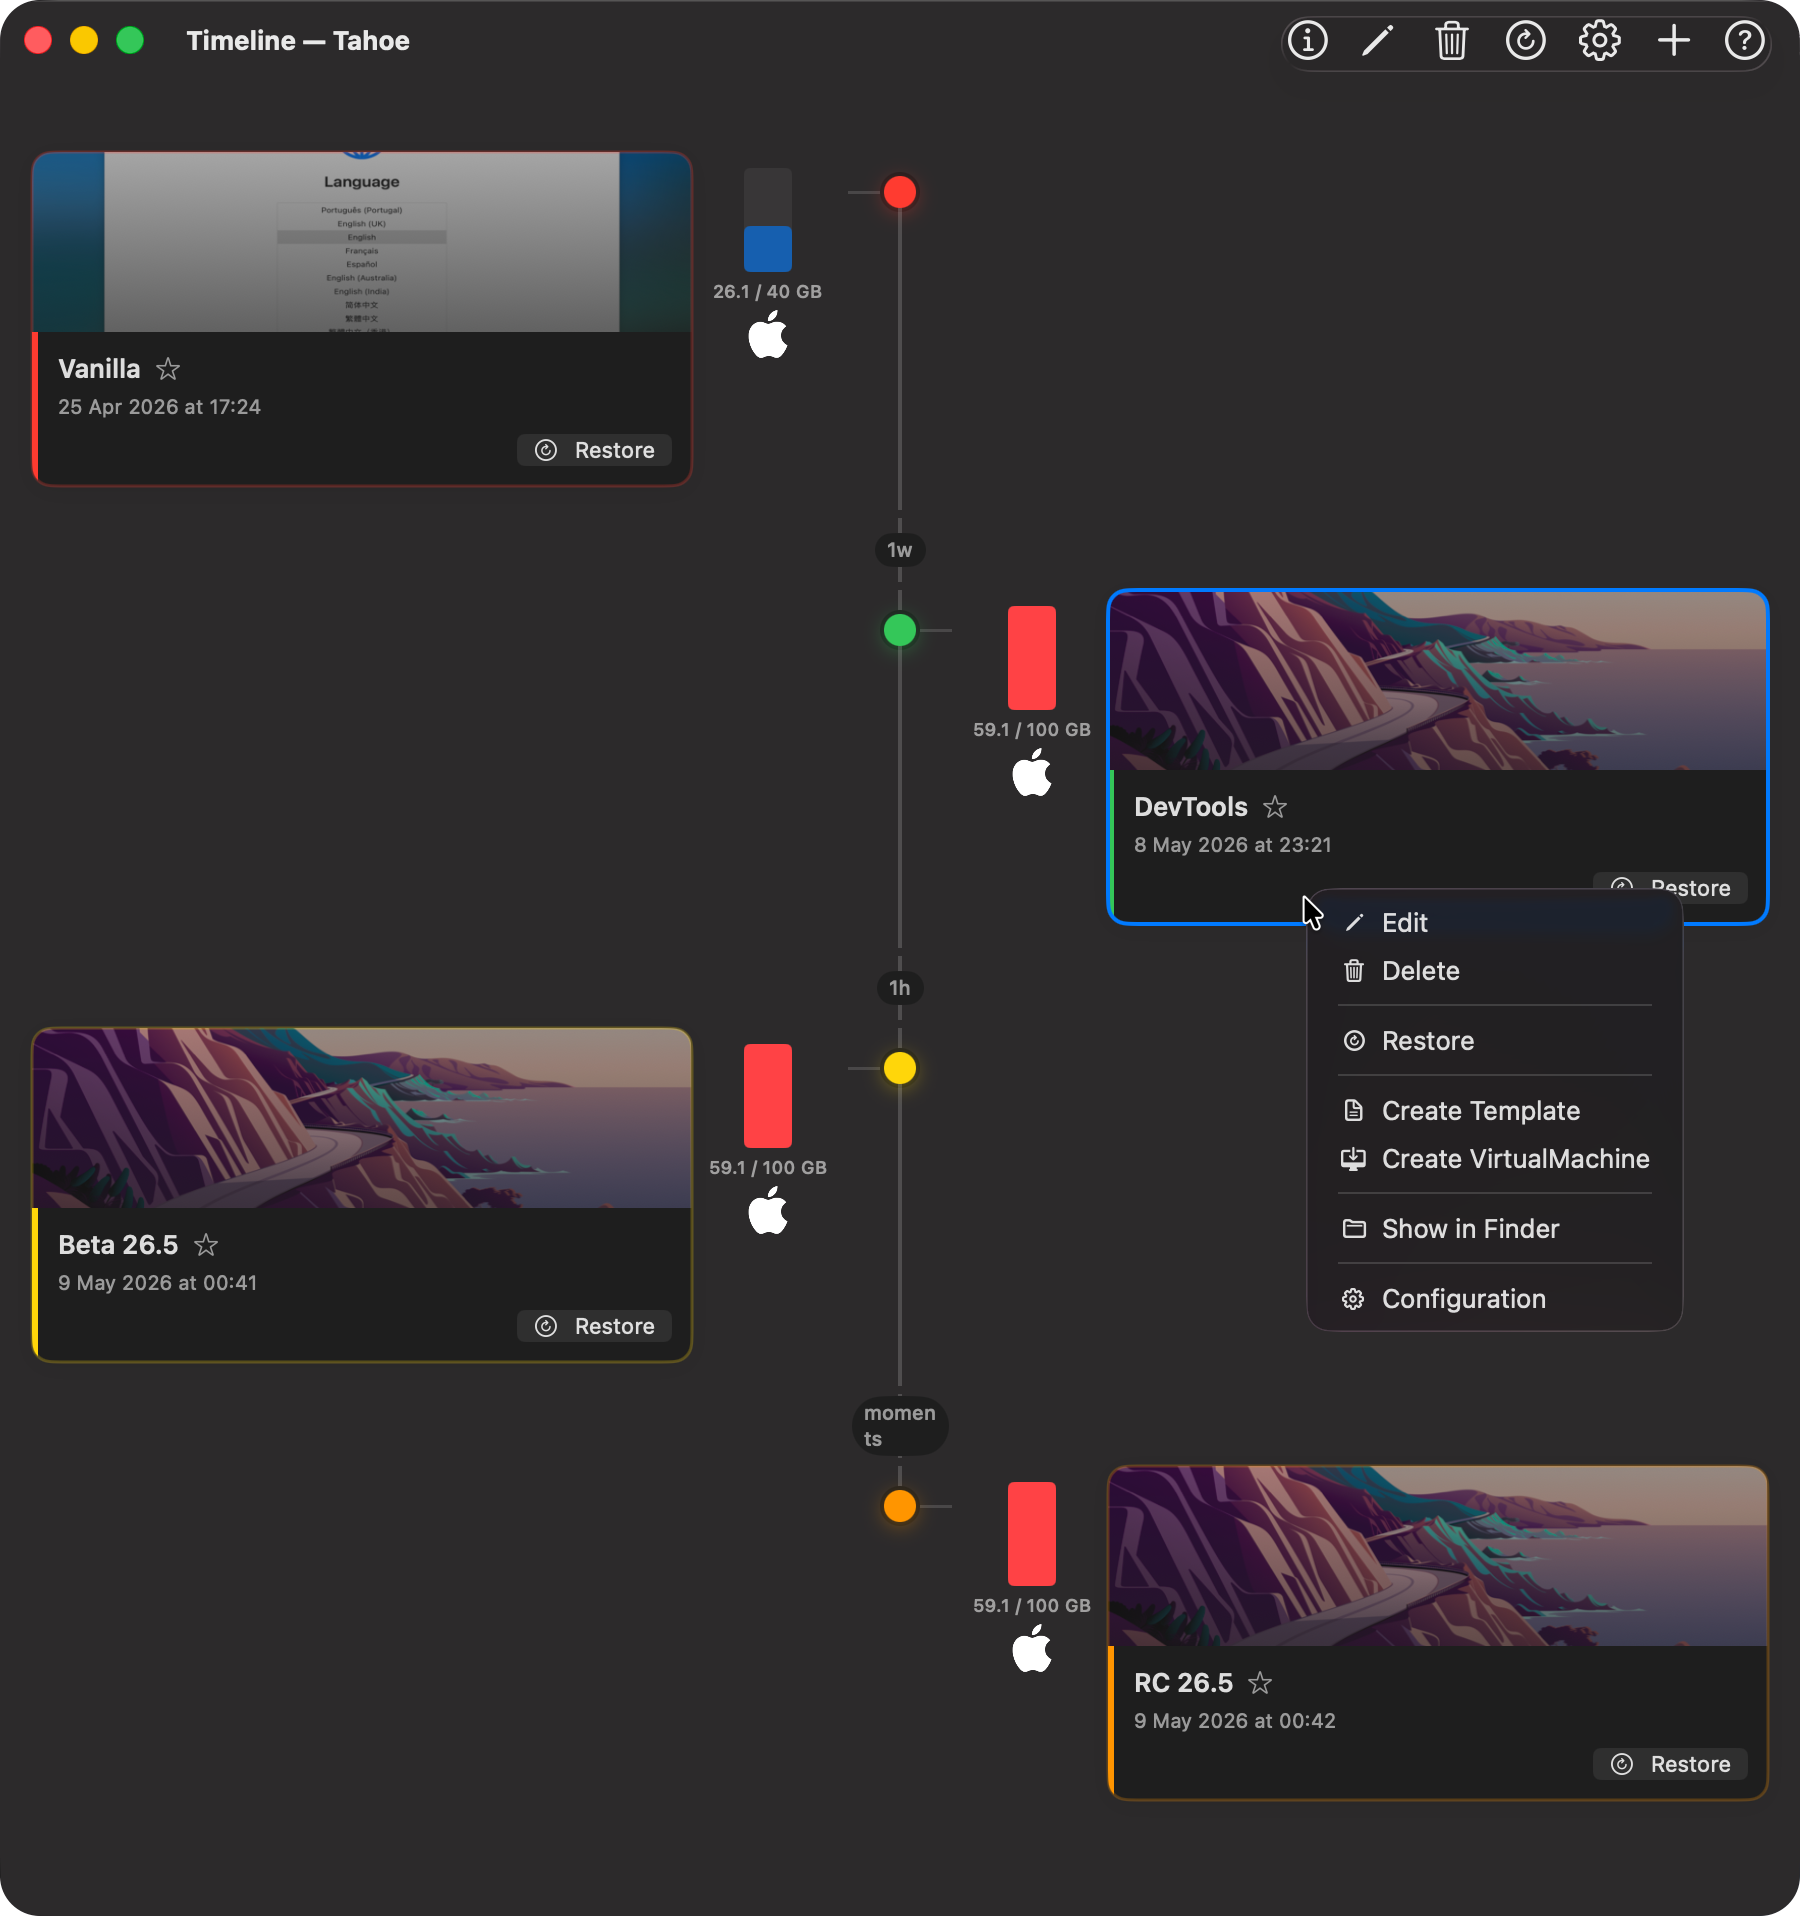
Each snapshot appears as a card showing its thumbnail, name, date, notes, and disk usage. Time gaps between snapshots are labelled directly on the spine so you can see at a glance how much time passed between each saved state.
Access
You can open the Snapshot Timeline from three places:
- Snapshots toolbar — click the 🕐 clock icon in the top toolbar of the Snapshots window.
- Right-click context menu — right-click any snapshot in the Snapshots window and choose Show Timeline.
- Menu Bar — open the Snapshots menu and choose Show Timeline.
🔝 Top Toolbar
📸 Screenshot:

The toolbar adapts based on whether a snapshot card is selected.
When a snapshot is selected (left to right):
-
ℹ️ Quick Info
View CPU, RAM, disk, and network configuration details for the selected snapshot in a pop-up. -
✏️ Edit
Edit the name and notes of the selected snapshot. -
🗑 Delete
Permanently delete the selected snapshot. -
↺ Restore
Revert the virtual machine to the state captured in the selected snapshot. You will be asked to confirm and optionally create a safety snapshot before restoring. -
⚙️ Configuration
Open the configuration of the selected snapshot (read-only).
Always visible:
-
➕ Take Snapshot
Create a new snapshot of the current state of the virtual machine. -
❓ Help
Open this help page.
🖱️ Right-Click Context Menu
Right-clicking any snapshot card opens a context menu with the following actions:
- Edit: Rename the snapshot or update its notes.
- Delete: Permanently remove the snapshot.
- Restore: Revert the virtual machine to this snapshot's state.
- Create Template: Save this snapshot as a reusable VM template.
- Create Virtual Machine: Create a new standalone virtual machine from this snapshot.
- Show in Finder: Reveal the snapshot bundle in Finder.
- Configuration: View the configuration of the snapshot.
Timeline Layout
Snapshots are displayed oldest at the top → newest at the bottom, matching the order in the Snapshots window.
Each row uses a three-column layout:
- Disk column (inner edge) — a proportional bar showing disk usage relative to the largest snapshot, the usage label (e.g.
0.3 / 20 GB), and the VM icon below. - Spine (centre) — a vertical line connecting all nodes. A short horizontal arm extends toward the card. Time gap labels appear on the spine between each pair of snapshots.
- Card (outer half) — the snapshot card with thumbnail, name, date, notes, and a Restore button. Cards alternate left and right so consecutive snapshots sit on opposite sides.
Clicking a card selects it and enables the selection-dependent toolbar buttons.
Manual vs Auto Snapshots
The timeline visually distinguishes between manually created snapshots and automatically scheduled ones.
| Element | Manual | Auto |
|---|---|---|
| Node | Filled circle (accent colour) | Hollow ring with 🕐 clock icon |
| Card border | Accent colour, slightly prominent | Subtle grey |
| Card background | Full opacity | Slightly dimmed |
| Name weight | Semibold | Regular |
| Disk bar colour | Blue (accent) | Orange |
| Auto badge | Not shown | 🕐 Auto pill on the card |
Time Gap Labels
Between every pair of adjacent snapshots, the spine displays a label showing the elapsed time:
| Display | Meaning |
|---|---|
moments |
Less than 2 minutes |
Xm |
Minutes |
1h / Xh |
Hours |
1d / Xd |
Days |
1w / Xw |
Weeks |
Restoring a Snapshot
You can restore from the timeline in two ways:
- Inline Restore button on any card — restores immediately after confirmation.
- Toolbar Restore button — available when a card is selected.
Both methods show a confirmation dialog with an option to Create a Safety Snapshot Before Restore. Enabling this takes a new snapshot of the current state before overwriting it, so you can return if needed.
⚠️ The virtual machine must be stopped before restoring a snapshot.
💡 The Snapshot Timeline is a read-focused companion to the Snapshots window. Use it to understand the history and progression of your virtual machine at a glance.