Application Settings
The Settings window in VirtualProg allows you to configure global application preferences, including virtual machine storage, shared folders, appearance, and system behaviors.
📦 Storage
📸 Screenshot:
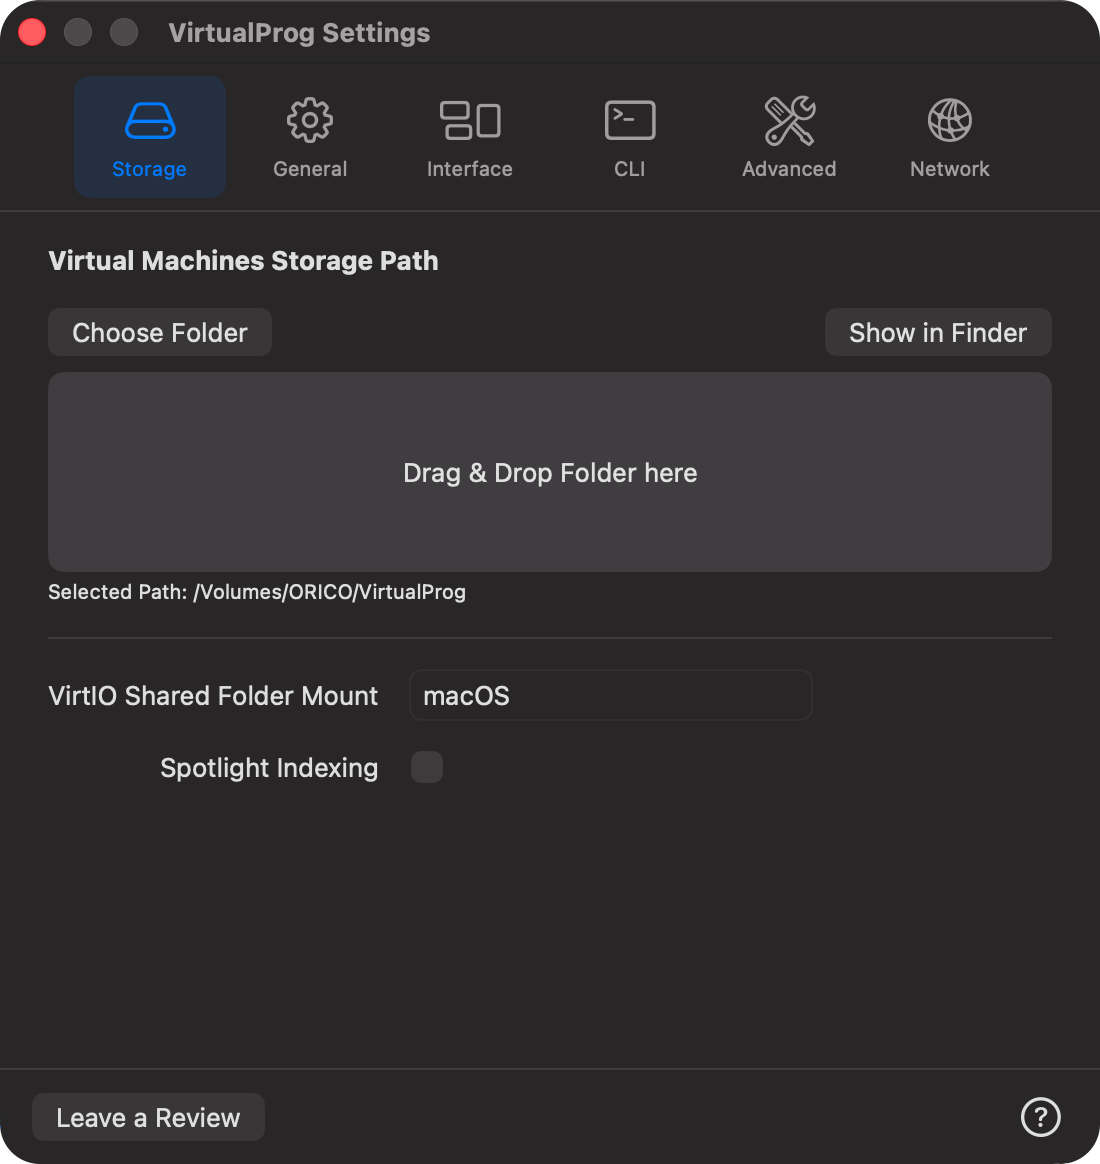
🗂 Storage Path
Choose where VirtualProg stores all your virtual machines:
- Choose Folder: Select a custom folder as your VM storage location.
- Drag & Drop Folder: Alternatively, drag a folder into this area to set it.
- The Selected Item field below confirms the active storage path.
All VMs, snapshots, templates, and restore images are saved here.
📁 VirtIO Shared Folder Mount
Define the mount name that will be used inside Linux guests when VirtIO folder sharing is enabled.
- This name (e.g.,
macOS) is required when mounting the shared folder with VirtioFS. - Example command in Linux guest:
🔍 Spotlight Indexing
When enabled, VirtualProg will automatically index all your virtual machine names in macOS Spotlight.
This allows you to quickly search and launch virtual machines directly from Spotlight by typing their names.
When disabled, all previously indexed virtual machines will be removed from Spotlight to keep your system index clean.
⚙️ General
📸 Screenshot:

🎨 Appearance
Choose your preferred user interface theme:
- System: Follows the system appearance (Light or Dark).
- Light: Forces a light mode appearance.
- Dark: Forces a dark mode appearance.
🚀 Launch at Login
- Automatically launch VirtualProg when the user logs into macOS.
🧭 Minimize on Control Center Close
When enabled, clicking the close button in the Control Center window title bar will minimize the window instead of quitting VirtualProg. This helps keep VirtualProg running in the background while keeping your workspace tidy.
🖼️ Screenshot Background
Use a VM screenshot as the background image.
🔀 VM Switcher
The VM Switcher lets you quickly switch between running virtual machines using a keyboard shortcut — without touching the mouse.
📸 Screenshot:
⌨️ Shortcut
Configure the global keyboard shortcut used to open the VM Switcher overlay. The default is ⌃⌥V (Control + Option + V).
- Click the shortcut field and press your desired key combination to record a new shortcut.
- The shortcut must include at least one of ⌃ Control, ⌥ Option, or ⌘ Command.
- Click the ↺ button to reset to the default shortcut.
The shortcut is also visible in the Help menu under VM Switcher, so it can also be triggered from there.
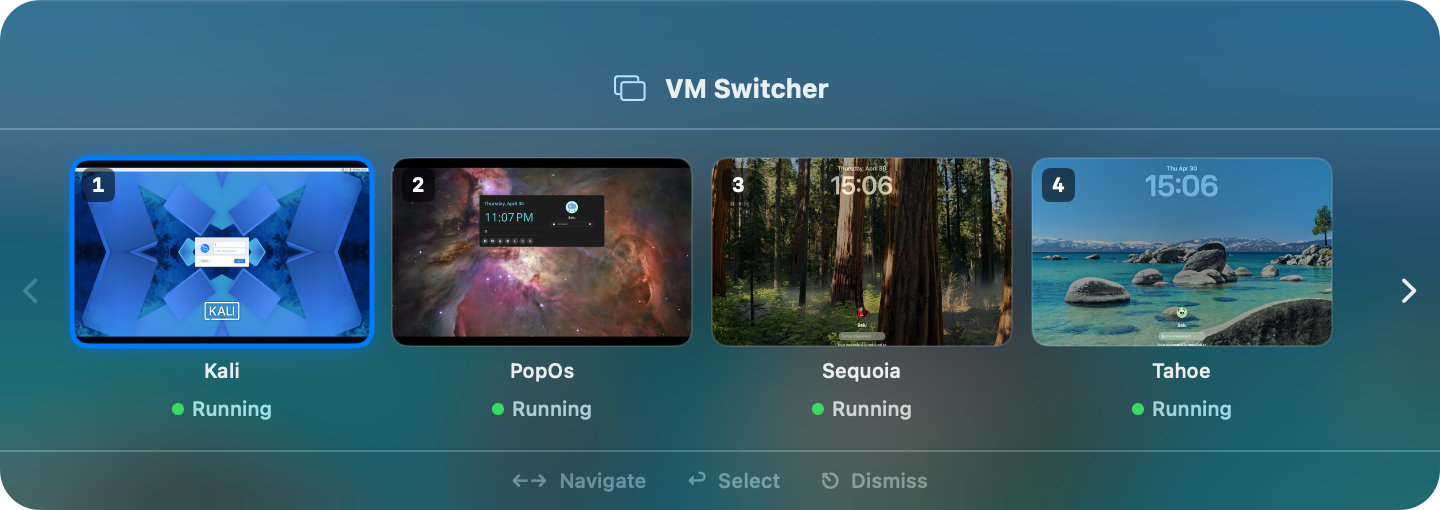
🖼️ Using the VM Switcher
When triggered, a floating overlay appears showing all running and suspended (non-headless) VMs as thumbnail cards:
- ←→ Arrow keys or the chevron buttons to navigate between VMs.
- Number keys 1–9 to jump directly to one of the first nine VMs. For VMs beyond position 9, use the arrow keys to navigate to them.
- ↩ Return to switch to the selected VM.
- ⎋ Escape to dismiss without switching.
Headless VMs are excluded from the switcher. Suspended VMs are included and shown with a blue indicator.
🪟 Interface
📸 Screenshot:
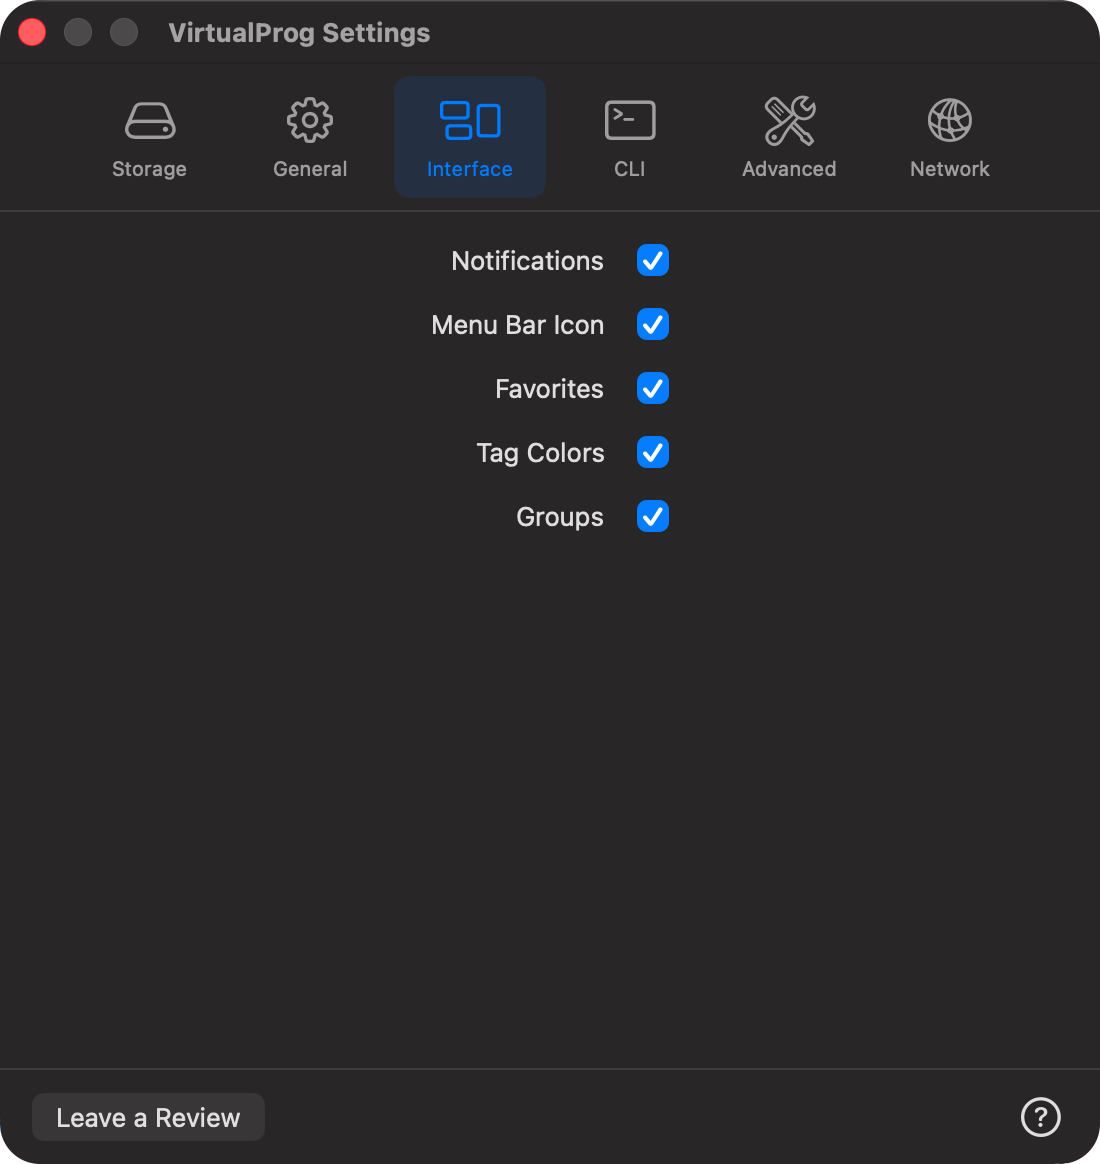
- Notifications: Display system notifications for virtual machine events.
- Menu Bar Icon: Display the VirtualProg icon in the macOS menu bar.
- Favorites: Mark VMs, templates, or snapshots as favorites for quick access.
- Tag Colors: Show or hide color-coded tags for VMs, snapshots, and templates.
- Groups: Organize VMs into groups for easier management.
- Window Border: Enable or disable a tag colored border around VM windows for better visibility.
- Widget: Enable the macOS widget to display virtual machine status on your desktop or Notification Center. When disabled, the widget is cleared immediately. More Info
💻 CLI
📸 Screenshot:
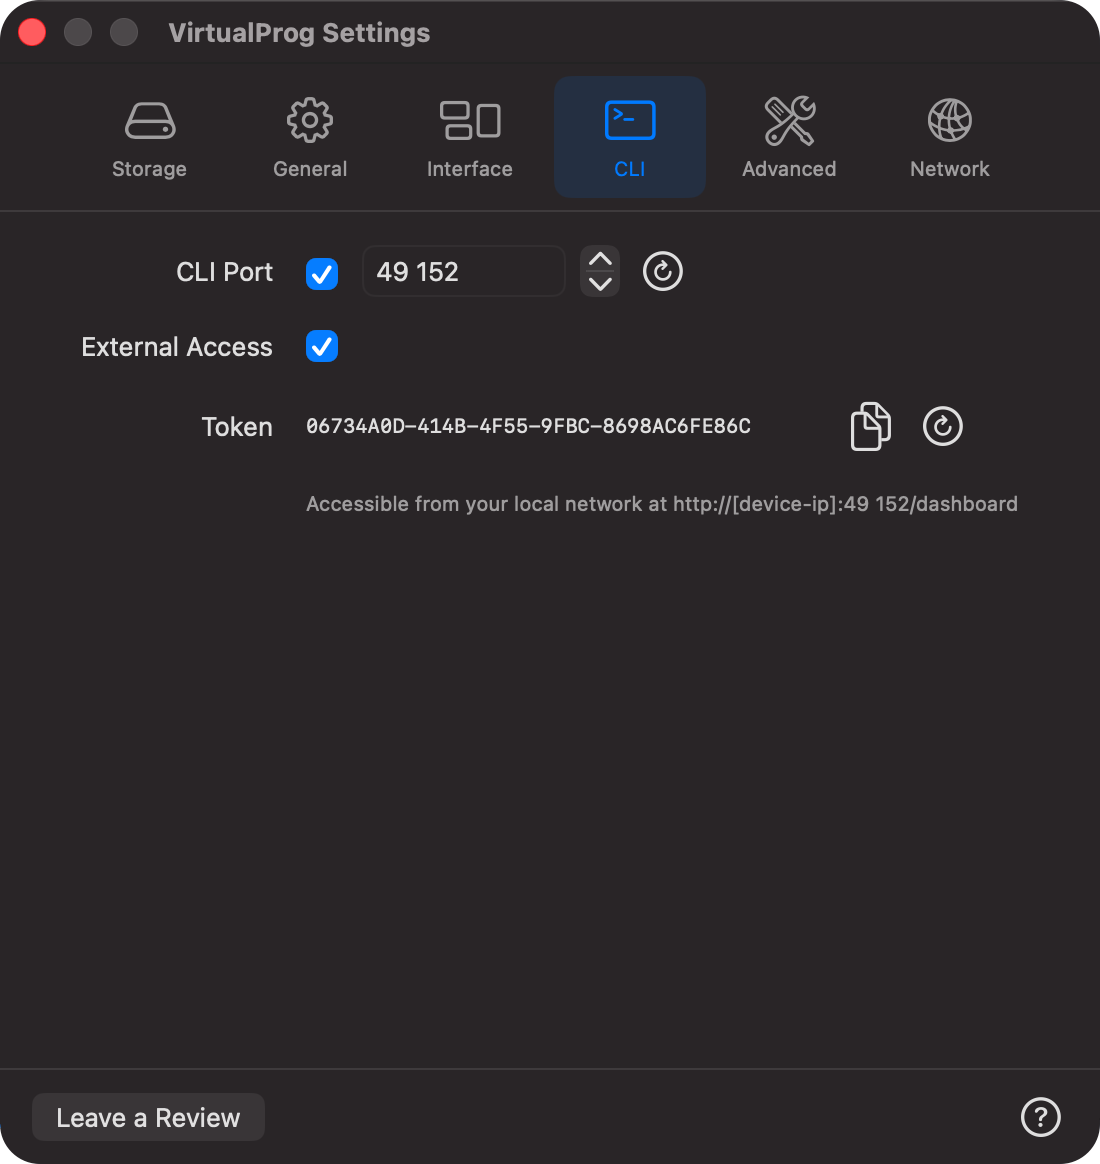
💻 CLI Port
The CLI port is used to communicate with VirtualProg from the command line vpvm.
- Enable CLI port: Allows remote control and automation of VirtualProg operations via vpvm commands.
- Port: Specify the port number to use for the CLI.
- Restart : Restart the CLI service after changing the port.
- Download the vpvm cli from https://makeprog.com/Products/VirtualProg/vpvm.zip**
- More Info About Command Line
- External Access: Enable remote control of VirtualProg via vpvm commands/web dashboard from other machines on the network.
- Token: A unique authentication token required for remote CLI access. You can copy the current token or generate a new one if needed.
- There is also a Web Dashboard available and you can access it from a browser locally or over the network at
http://macip:port/dashboard. When HTTPS is enabled (see below), usehttps://instead.
🔐 HTTPS (TLS)
Encrypts all traffic between vpvm, the web dashboard, and the VirtualProg server — including the auth token and the remote screen stream.
Enabling HTTPS
- Toggle HTTPS on in the CLI section of Settings.
- An Open panel will appear — select your
.p12or.pfxPKCS#12 certificate file. - Enter the certificate password when prompted, then click Import.
- The server restarts automatically and begins serving HTTPS.
Once enabled, the web dashboard URL changes to https:// and vpvm automatically uses HTTPS when connecting to the local server — no --secure flag needed.
Certificate Requirements
- Format: PKCS#12 (
.p12or.pfx) — a single password-protected file containing both the private key and the certificate chain. - The certificate can be self-signed or issued by a CA. If self-signed, browsers will show a security warning; accept it once, or add the certificate to your macOS Keychain trust store to avoid future warnings.
- The certificate file is stored at
server.p12inside your VM storage folder.
Replacing a Certificate
Click Replace next to the current certificate name to import a different .p12 file. The old file and Keychain entry are overwritten immediately.
Disabling HTTPS
Toggle HTTPS off. The certificate file and its Keychain password are deleted immediately and the server reverts to plain HTTP.
🔐 Two-Factor Authentication (2FA)
The Two-Factor Auth row shows whether 2FA is active for the web dashboard.
- If not enabled, set it up from the web dashboard (see Web Dashboard Settings).
- If enabled, click Disable and confirm to turn it off. Any open dashboard sessions are signed out immediately.
🔒 IP Allowlist
When External Access is enabled, you can restrict which remote hosts are permitted to connect to the CLI server.
- Allow access from specific IPs / CIDRs only: Toggle to enable the IP allowlist. When active, only addresses in the list are granted access; all other remote connections are rejected with a
403 Forbiddenresponse. - Adding entries: Type an IPv4 address (e.g.
192.168.1.10), IPv6 address, or CIDR range (e.g.192.168.1.0/24,10.0.0.0/8) in the text field and click Add or press Return. - Removing entries: Click the 🗑️ trash icon next to any entry to remove it.
- Empty list behaviur: If the allowlist is enabled but contains no entries, all remote connections are blocked.
- Localhost exemption:
127.0.0.1and::1always have access regardless of the allowlist setting. - Blocked connection attempts are recorded in the application log (accessible via Help → Logs) with the offending IP address for auditing.
💡 Use CIDR notation to allow an entire subnet in a single entry (e.g.
192.168.0.0/16covers the whole192.168.x.xrange).
🛠️ Advanced
📸 Screenshot:
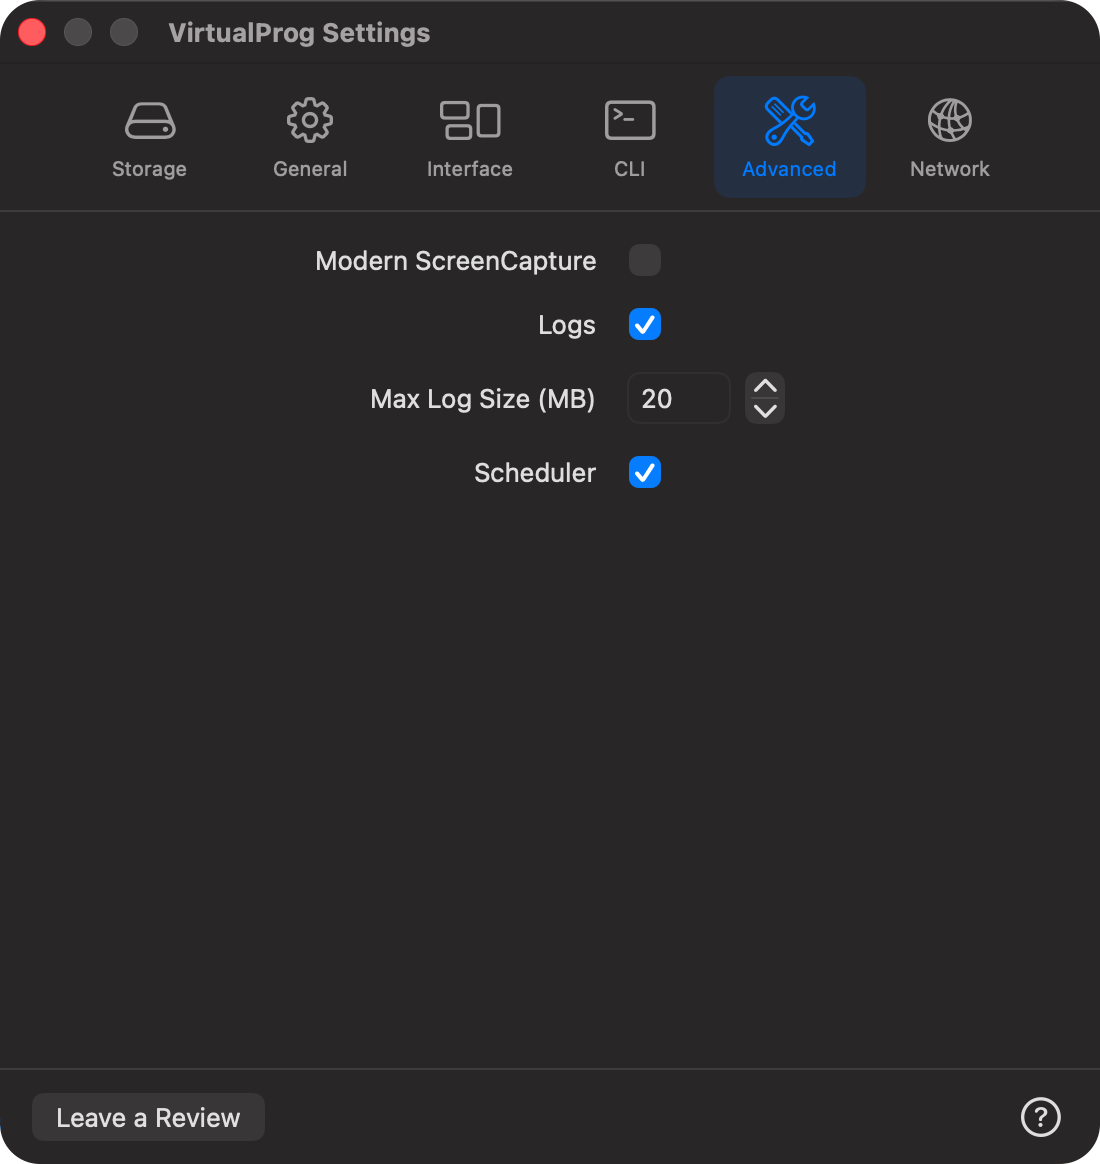
🎥 Modern ScreenCapture
VirtualProg now supports a more reliable and efficient screen recording method using macOS ScreenCaptureKit (macOS 13+). This option ensures better compatibility and performance when recording VirtualProg's interface.
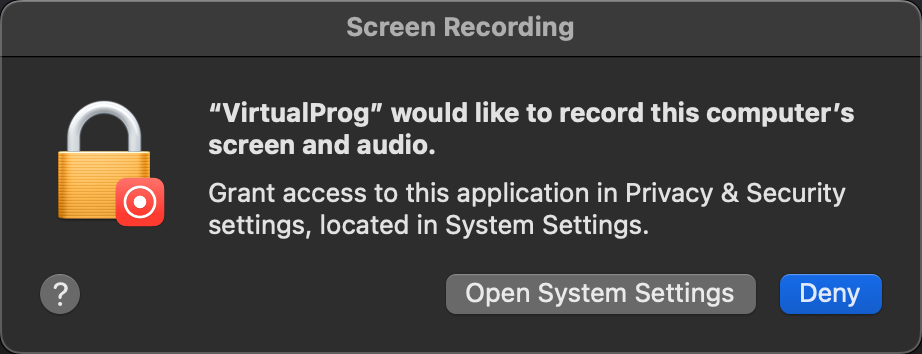
✅ Enabling Modern ScreenCapture
To activate this feature:
- Enable the Modern ScreenCapture checkbox in the settings.
- A macOS system prompt will appear requesting permission for VirtualProg to record your screen and audio.
- Grant screen recording access to VirtualProg by navigating to:
System Settings → Privacy & Security → Screen Recording
- After giving access, return to VirtualProg, re-enable the checkbox, and click the Test button.
📸 Screenshot:
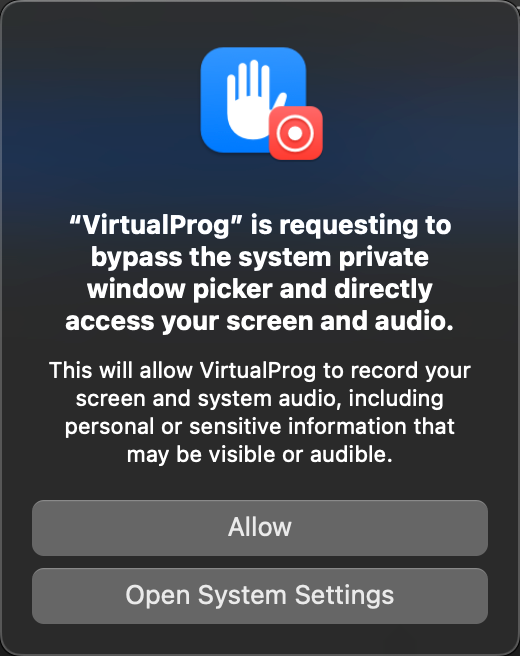
🧪 Testing Screen Access
When you click the Test button:
-
macOS will display a System Private Window Picker prompt requesting permission for VirtualProg to bypass the system's standard picker and directly access your screen.
-
Allowing this is essential for Modern ScreenCapture to function.
📸 Screenshot:
ℹ️ Important Notes
- Only VirtualProg windows are recorded. No other apps or parts of the screen are captured.
- If the test is successful, a confirmation message will appear.
- If the test fails:
- Disable the checkbox.
- Re-enable it.
- Repeat the process.
This screen recording method is designed to integrate securely with macOS privacy standards while offering seamless capture support for VirtualProg.
🖥️ Required for Console-Based VMs in Remote Control
If you use the Web Dashboard Remote Control (Connect) feature to view a VM that runs a console-only operating system — such as a headless Linux server with no graphical desktop — Modern Screen Capture must be enabled for the display to work.
Without it, the remote viewer will show a blank screen. The standard screenshot method used by default cannot capture console-mode VM windows.
Enable Modern Screen Capture and complete the permission steps above before using Remote Control with console-based VMs.
📜 Logs
Enable logging of VM activity. Logs can be accessed from the Help menu.
📏 Max Log Size (MB)
Defines the maximum size of the log and dashboard log files. When this limit is reached, the log file is cleared and recreated.
⏰Scheduler
Enable or disable the scheduler. By default it is enabled.
🔒 Safe Snapshot Restore
When enabled, snapshot restores use an atomic swap — the snapshot is copied to a temporary location first, then swapped into place only after a successful copy. This prevents data loss if an error occurs mid-restore.
⚠️ Requires approximately 2× the VM's disk size free during restore.
When disabled, VirtualProg deletes the current VM bundle before copying the snapshot (faster, but non-recoverable on failure).
Default: Enabled
🖥️ Web Stream HiDPI
When enabled, the web dashboard remote control stream captures frames at the display's native physical resolution (Retina / HiDPI). This produces a sharper image in the browser, matching the quality of the native VM window.
When disabled, frames are captured at logical (1×) resolution — smaller file sizes, lower bandwidth usage, and faster delivery. This is the recommended setting for remote connections over the internet or slower networks.
Default: Disabled
💡 If you connect to the web dashboard exclusively over a local network and your browser runs on a Retina display, enabling this option will noticeably improve stream sharpness.
🔌 USB Passthrough (macOS 27 Golden Gate or later)
Enables USB device passthrough support. When turned on, VirtualProg registers a USB accessory listener so that USB devices connected to your Mac can be attached to running virtual machines.
When turned off, the listener is unregistered and no USB devices are available for passthrough.
Default: Disabled
🌐 Network
📸 Screenshot:
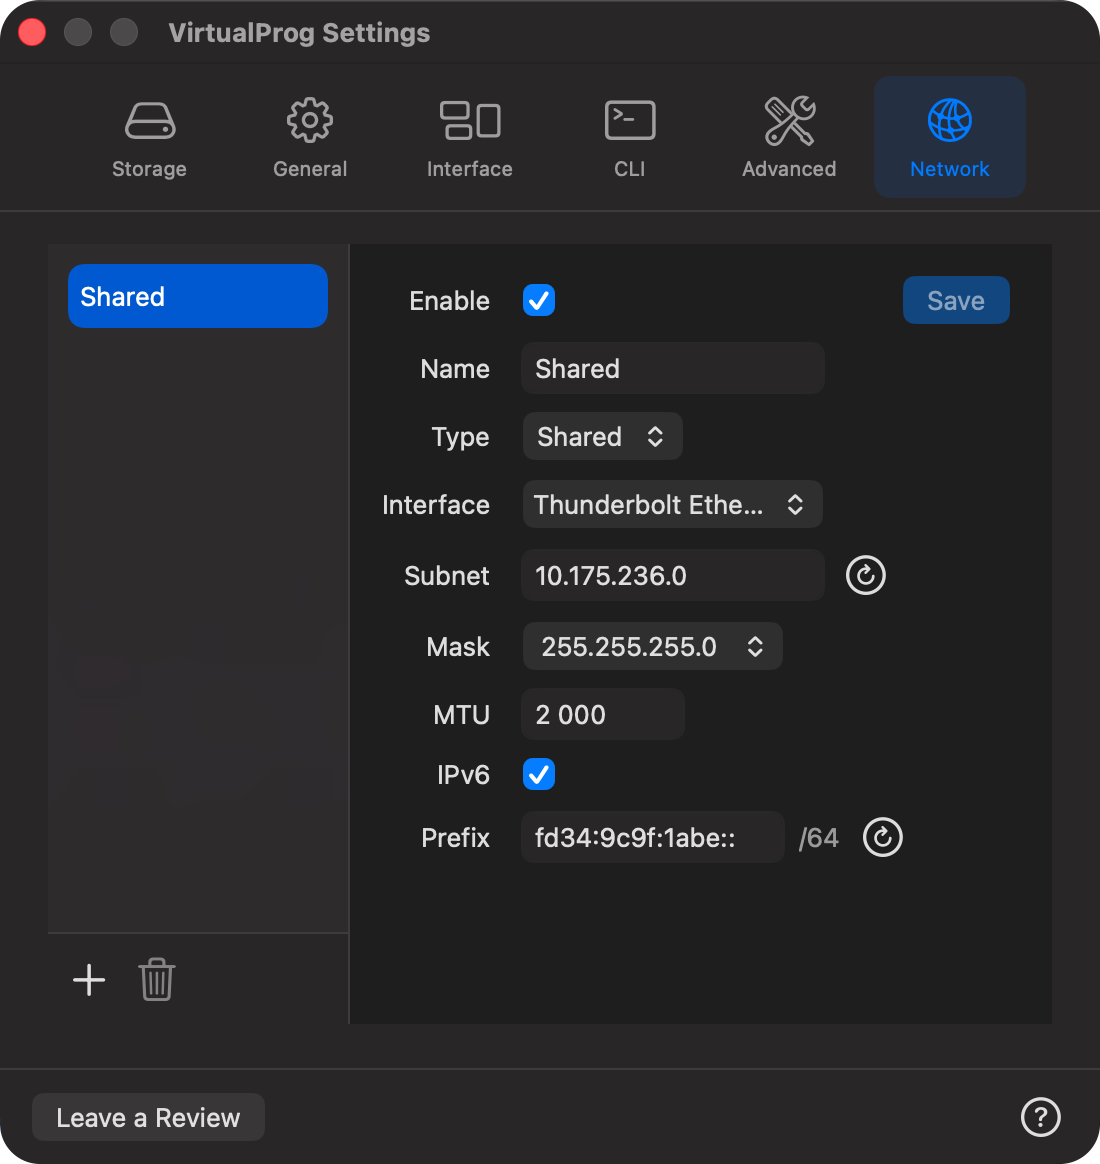
The Network tab is where you manage how your virtual machines connect to the world. You can create multiple isolated or shared interfaces here.
➕ Creating a New Interface
To add a new network, click the Plus (+) icon at the bottom of the sidebar. This will generate a new entry where you can define your network settings.
⚙️ Configuration Options
| Setting | Description |
|---|---|
| Enable | Toggle the checkbox to turn the network interface ON or OFF. |
| Name | Give your network a recognizable name (e.g., Shared or Development). |
| Type | Defines how traffic is routed (Shared, or Host-only). |
| Interface | Select which physical adapter (Wi-Fi, Ethernet) the VM should use. |
| Subnet | The IP address range for your virtual network. Click the 🔄 icon to randomize. |
| MTU | Set the packet size. Higher values (like 2000) can improve speed on supported hardware. |
| IPv6 | Enable this to support modern 128-bit IP addressing. |
| Prefix | The IPv6 prefix address. Click the 🔄 icon to randomize. |
🗑️ Deleting an Interface
If you no longer need a specific network configuration: 1. Select the interface from the left-hand sidebar (e.g., "Shared"). 2. Click the Trash icon at the bottom. 3. Note: This action is immediate. Ensure you have saved any important IP configurations before deleting.
💾 Saving Changes
The Save button in the top right will highlight when changes are detected. Always click Save before switching to another tab or closing the window to ensure your network updates are applied.
[!IMPORTANT] Changing network settings is not possible while the network is in use by running Virtual Machine.
💡 Changes here affect how VirtualProg behaves and presents across all virtual machines.
💬 Leave a Review
You can share your feedback or rate VirtualProg on the Mac App Store by clicking Leave a Review.
Your feedback helps improve future versions of VirtualProg and supports ongoing development.
If you enjoy using the app, consider leaving a positive review — it makes a big difference!