📸 Snapshots
The Snapshots tab gives you a dedicated view to manage all snapshots for any VM — select a VM from the dropdown, then create, restore, delete, or clone snapshots without leaving the browser.

Selecting a VM
Use the VM dropdown at the top of the toolbar to pick which VM's snapshots to view. The dropdown lists all VMs with a state indicator — ● for running, ○ for stopped. Selecting a VM immediately loads its snapshots.
Search and View
Use the search bar to filter snapshots by name. Use the ⊞ / ≡ / ↗ toggle to switch between card grid, list, and timeline view. Your view preference is saved across sessions.
Timeline View
The Timeline view presents snapshots as a visual vertical timeline ordered from newest to oldest, with cards alternating left and right around a central spine.
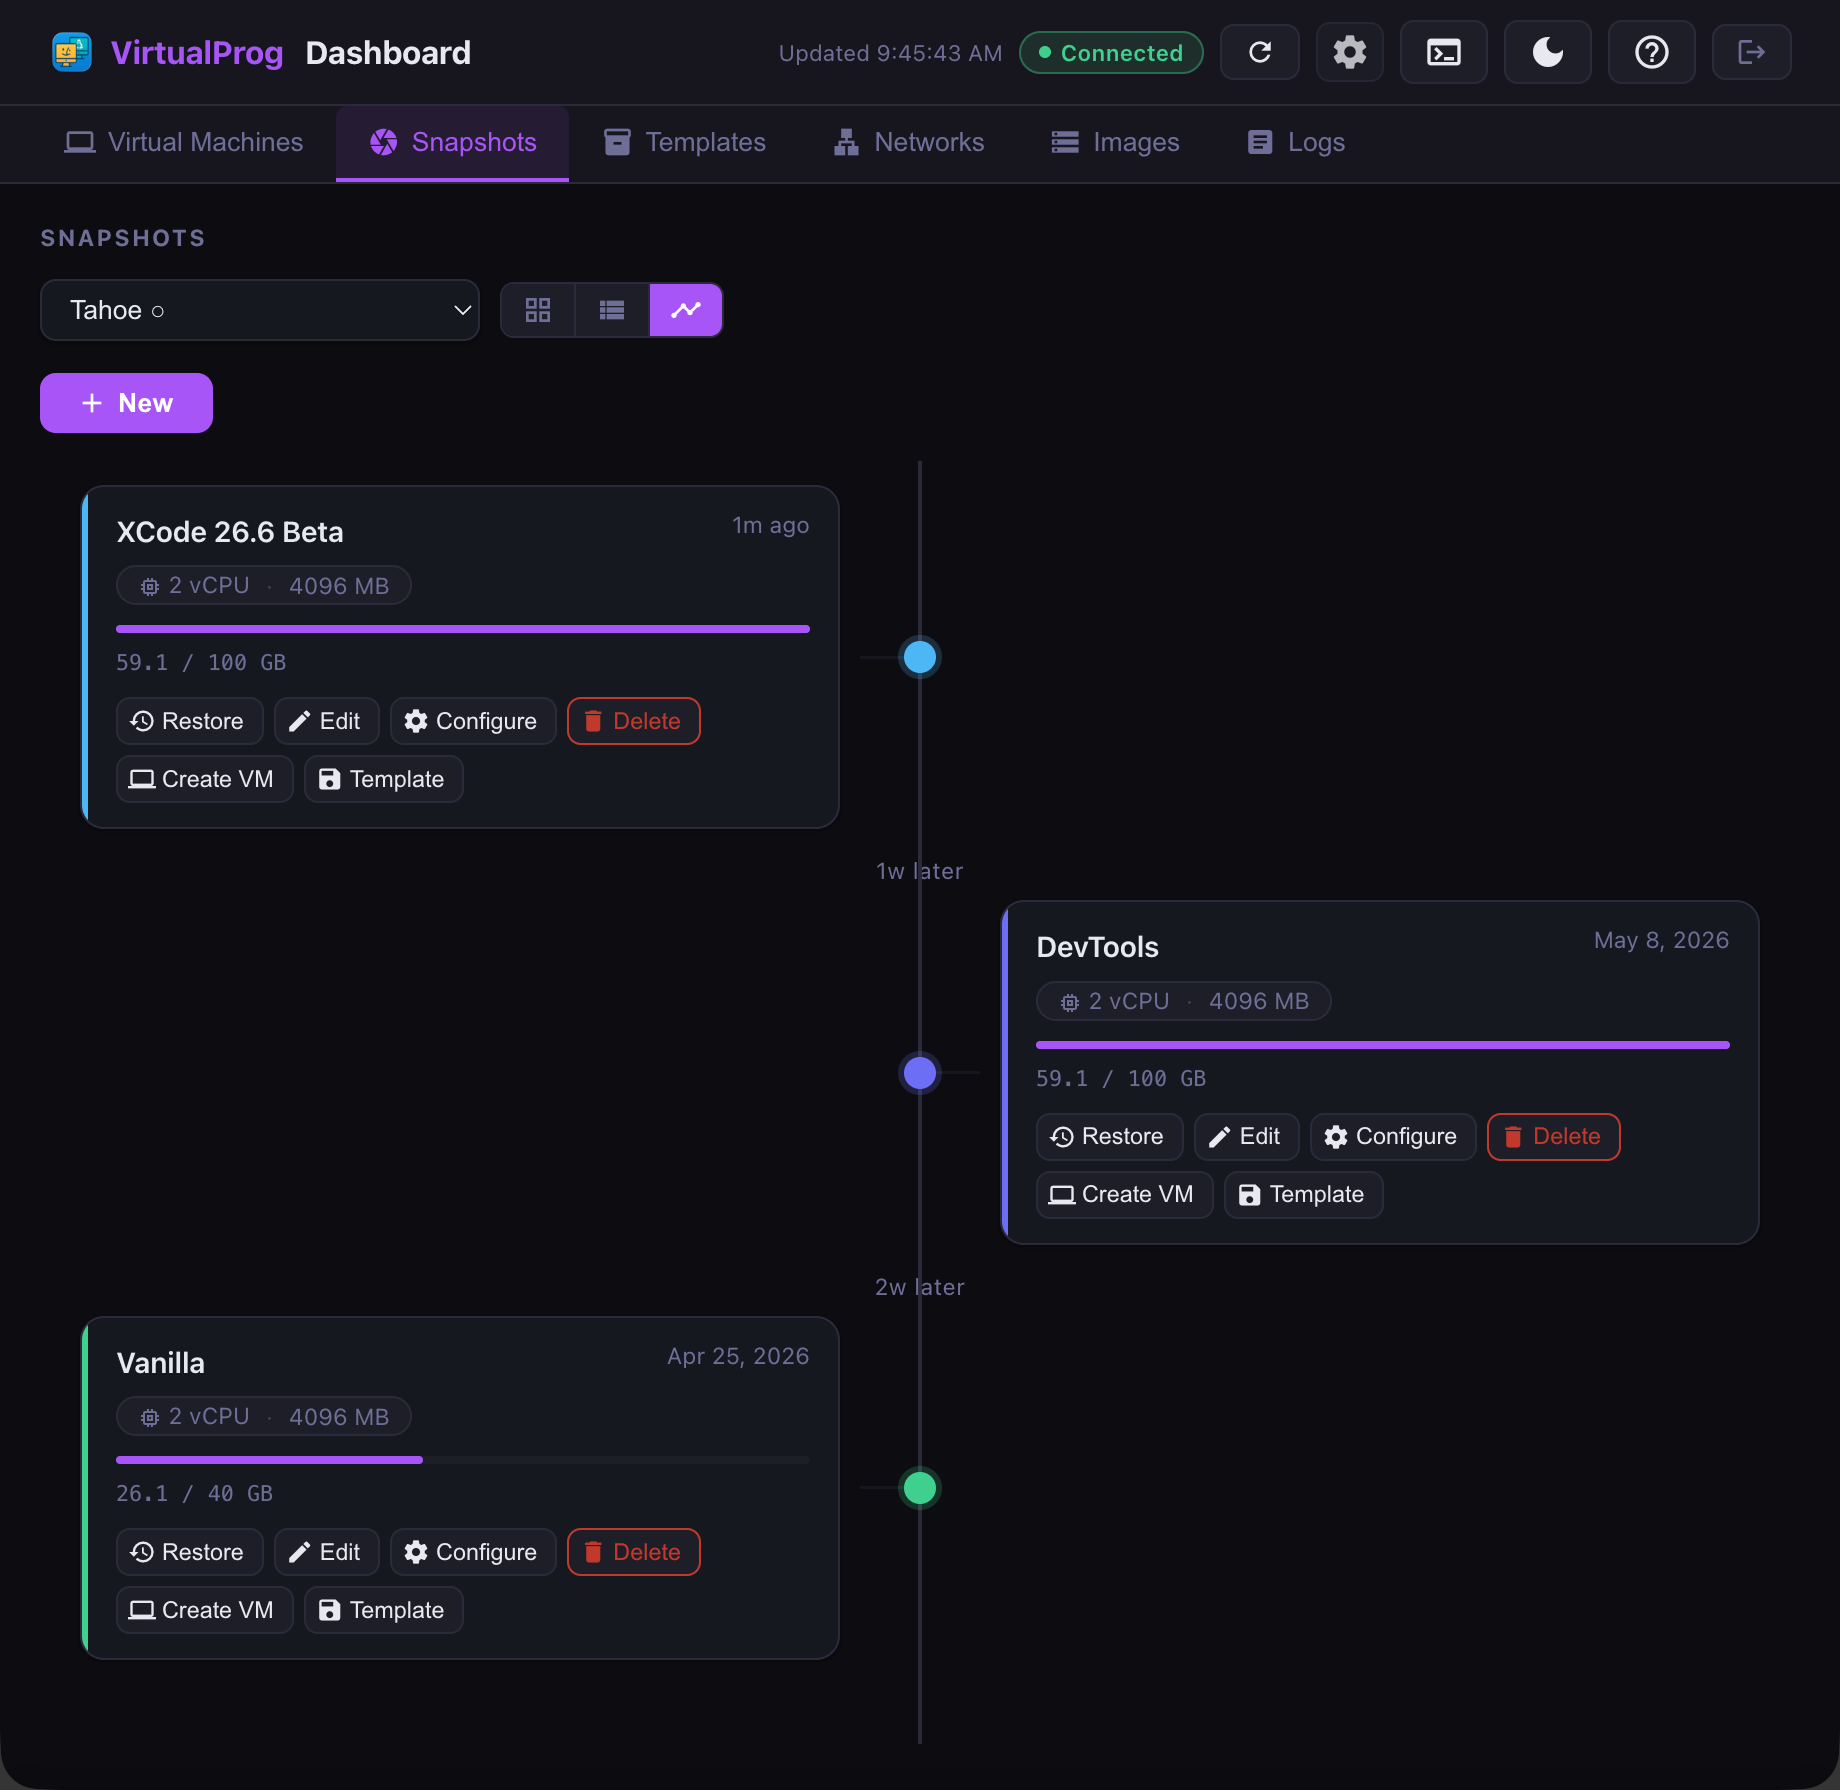
Each card shows:
- Snapshot name and creation time (e.g. 2h ago, 3d ago)
- An auto badge with a clock icon for automatically-scheduled snapshots
- CPU and memory settings recorded at snapshot time
- A disk usage bar showing used vs configured storage, color-coded from green (low) through orange (medium) to red (high)
- The full set of snapshot actions — Restore, Edit, Configure, Delete, Create VM, and Create Template
Colored nodes on the spine distinguish manual snapshots (solid accent color) from automatic ones (muted grey with a clock icon). Time gap labels between cards indicate how much time elapsed between consecutive snapshots.
The timeline updates automatically as background data refreshes.
Creating a Snapshot
When the selected VM is stopped, a + New button appears below the toolbar. Clicking it opens a dialog where you can enter a snapshot name and optional notes, then confirm to create it. The list refreshes automatically once the snapshot is created.
Snapshot creation requires the VM to be stopped.
Snapshot Actions
Each snapshot card or row shows the following actions:
| Action | When shown | Description |
|---|---|---|
| Restore | VM stopped | Reverts the VM to this snapshot state — a confirmation dialog appears first |
| Edit | Always | Rename the snapshot or update its notes |
| Configure | Always | View the hardware and behaviour settings of the VM at the time this snapshot was taken |
| Delete | Always | Permanently removes the snapshot — a confirmation dialog appears first |
| Create VM | Always | Creates a new VM from this snapshot — enter a name in the dialog |
| Create Template | Always | Saves this snapshot as a reusable template — enter a template name and optional notes in the dialog |
When the VM is running, Restore is hidden. All other actions remain available regardless of VM state.
The Edit button opens a dialog pre-populated with the snapshot's current name and notes. Update either field and click Save to apply the changes. The snapshot list and the VirtualProg app both reflect the changes immediately.
The Configure button opens a read-only view of the VM's configuration when the snapshot was created. This allows you to inspect the exact CPU, memory, and device settings preserved in the snapshot without making any changes.