📥 Import from UTM
Bring a Windows, Linux or macOS virtual machine from UTM into VirtualProg, with its apps, files and settings. VirtualProg copies the VM's disks into a new VM of the same kind; the UTM VM is only read and stays as it is. UTM doesn't need to be installed.
📸 Screenshot:
These UTM VMs can be imported:
| UTM VM | Becomes |
|---|---|
| Virtualize → macOS (Apple Virtualization) | A macOS VM |
| Virtualize → Linux with Apple Virtualization | A Linux VM |
| Virtualize → Linux with QEMU (ARM64, UEFI) | A Linux VM |
| Virtualize → Windows with QEMU (ARM64) | A Windows VM |
Emulated VMs (Emulate, such as x86_64 or another processor) can't be imported.
Before you import
- The import is tested with VMs made in UTM 5. If a VM was made with an earlier version, open it in UTM 5 first, so that it is updated, to avoid import problems.
- In UTM, shut the VM down. A VM that is running, paused or suspended can't be imported safely.
- Windows: if BitLocker (device encryption) is on, have the recovery key ready, or turn BitLocker off in Windows first. You find the key at aka.ms/myrecoverykey. Make sure you know your Windows password: the PIN and fingerprint stop working after the import.
- macOS: don't run the UTM copy and the imported VM at the same time. The imported VM keeps its identity, so macOS and your Apple ID see it as the same Mac.
Import
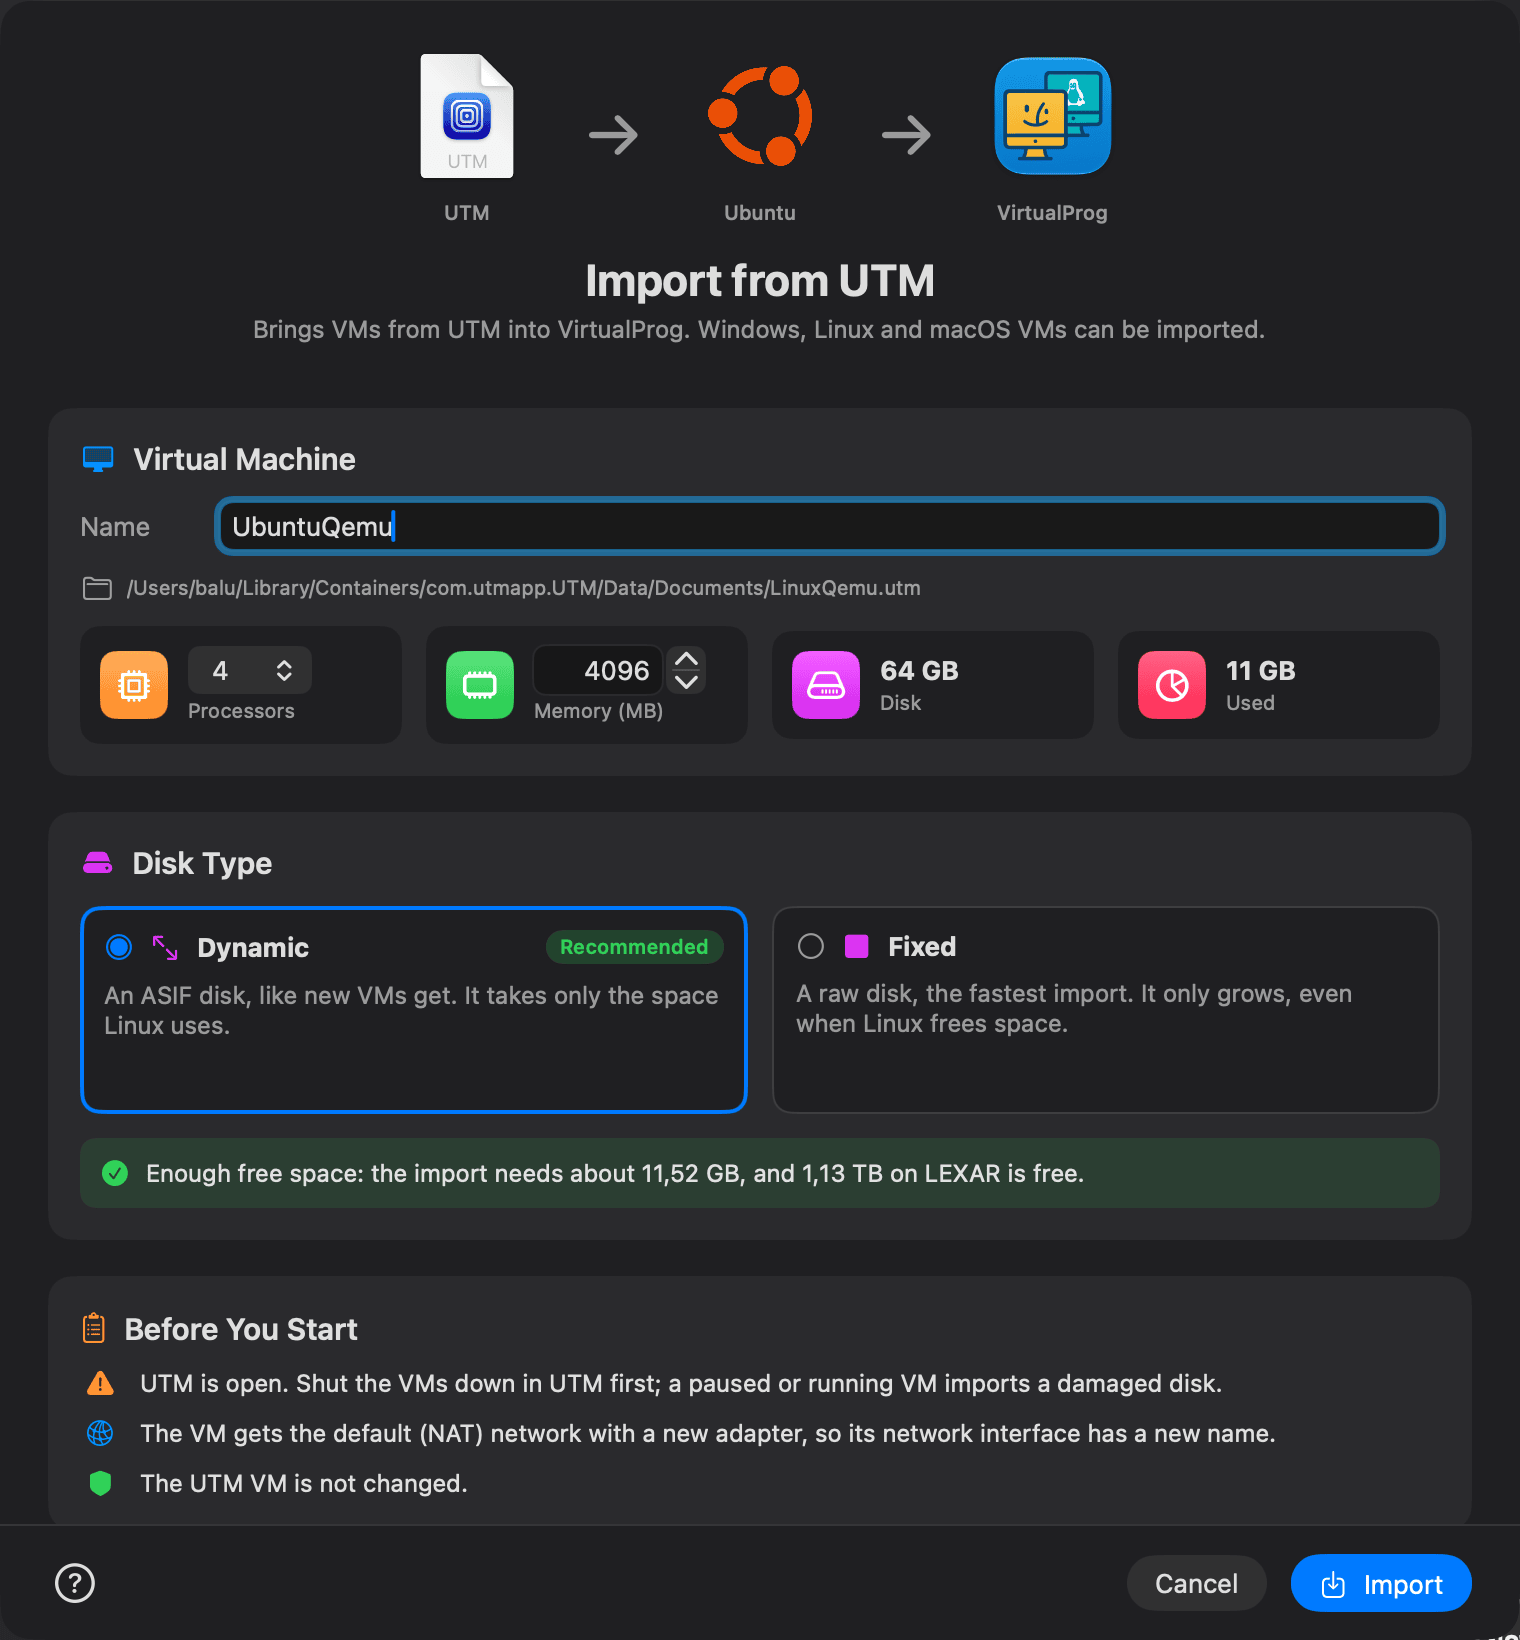
- Choose Tools → Import from UTM… in the Control Center, or right-click a VM and choose Import From → UTM….
- Select the
.utmVM. The window opens in UTM's folder (~/Library/Containers/com.utmapp.UTM/Data/Documents). To import several, select them all, or select the folder that holds them. - Check the name, and change the processors and memory if you like. With several VMs, each has a row; untick the ones to leave out. VMs that can't be imported are listed with the reason.
- Read the notes.
- Choose the Disk Type (macOS 26 or later; older macOS offers only Fixed):
- Dynamic (recommended): an ASIF disk, like new VMs get. It takes only the space the VM uses.
- Fixed: a raw disk. It only grows, even when the VM frees space.
- Check the free space line below the disk types, then click Import.
Only the used part of the disk is copied, so the new disk takes about as much space as it did in UTM.
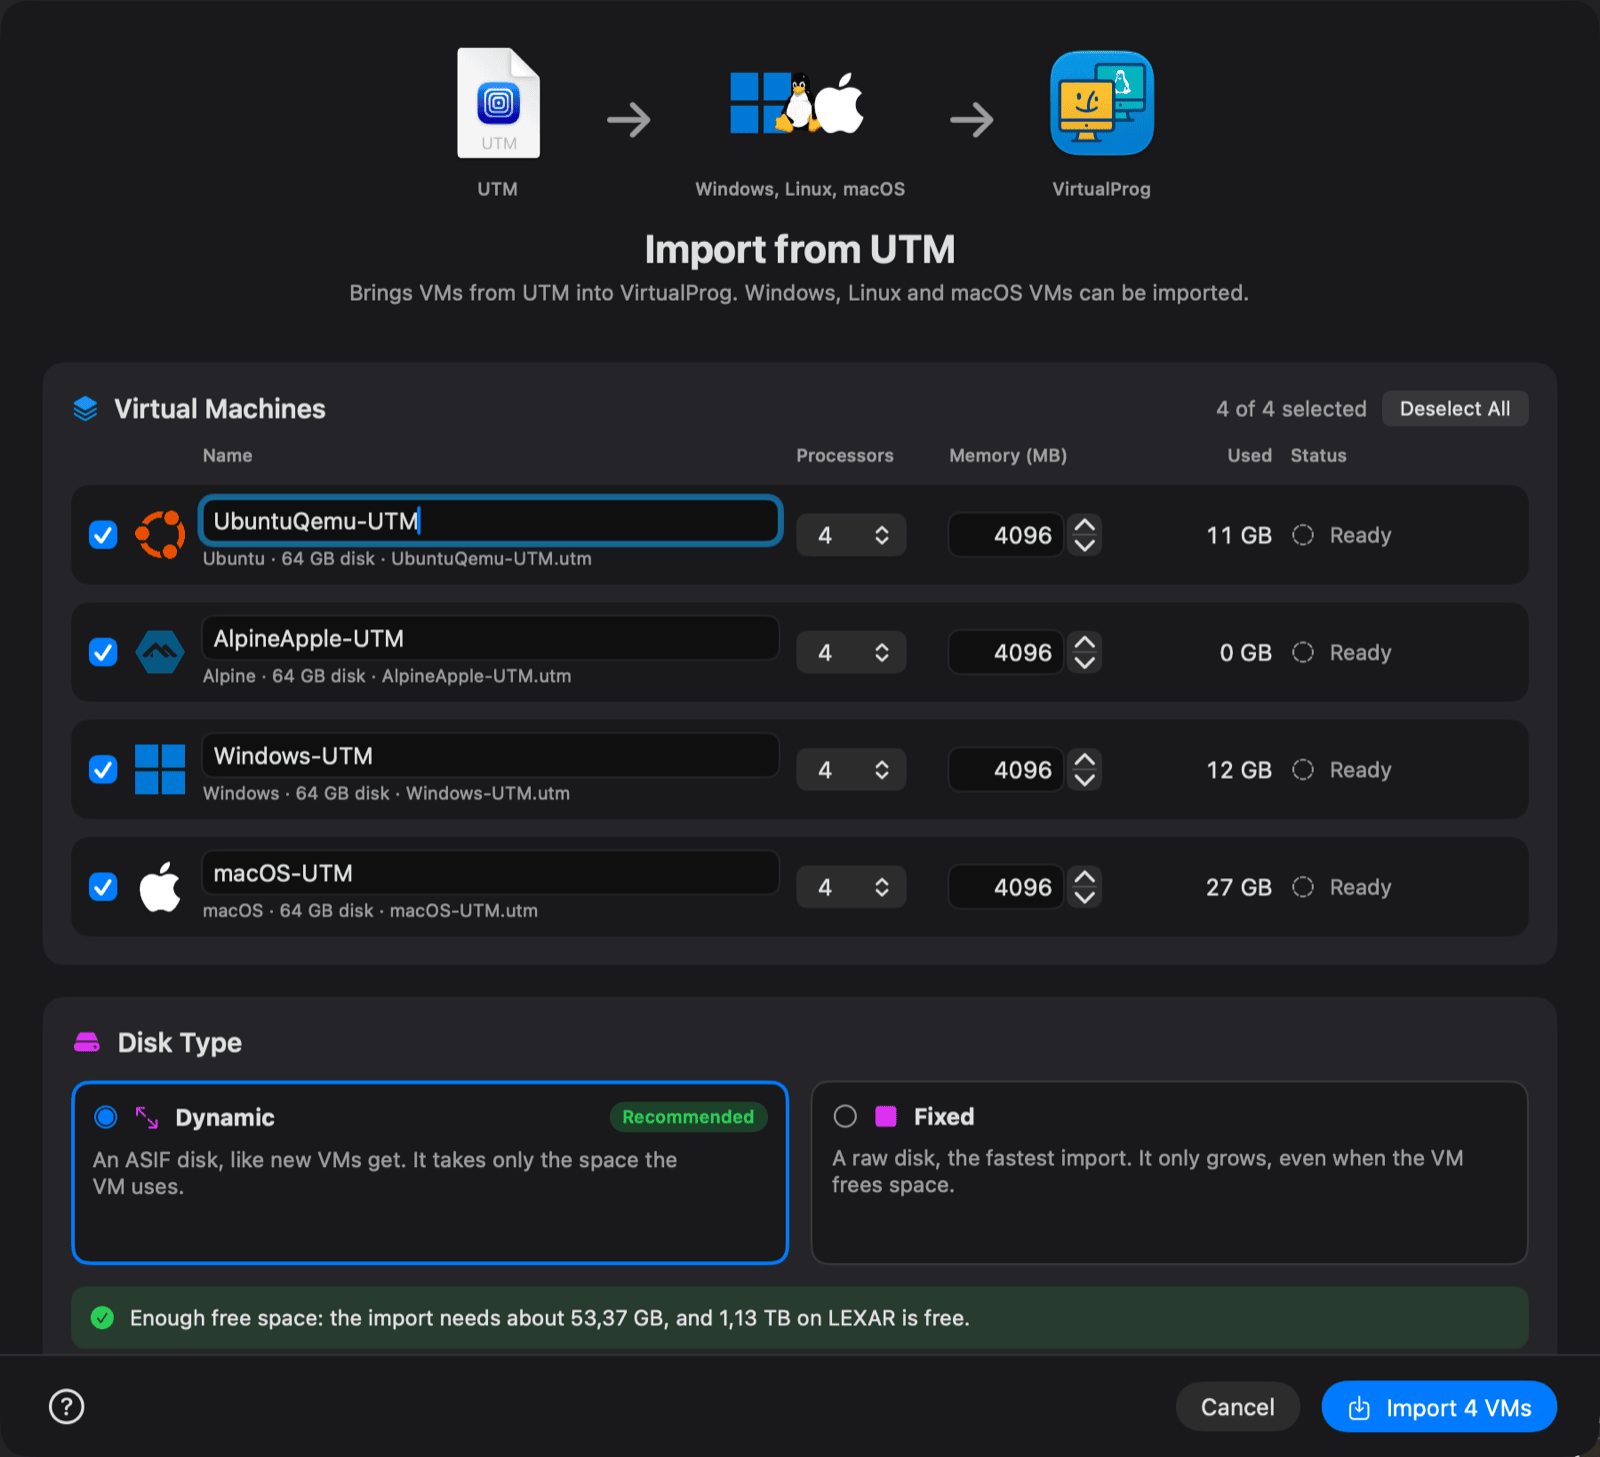
Several VMs are imported one after another, each row showing its progress. If one fails, the others still import. Cancel stops the VM being copied and skips the rest; the VMs already imported stay. When the import ends, each row shows its result, and Try Again imports the VMs that failed or were skipped.
After the import
Windows
- Start the VM. If Windows asks for the BitLocker recovery key, enter it.
- Sign in with your password, then set up the PIN and fingerprint again in Settings > Accounts > Sign-in options.
- Install Guest Tools: click Attach Disks in the VM
window's toolbar, choose Install Guest Tools, then run
install.cmdon the VirtualProgTools drive. Networking works only after this step. - If you like, uninstall UTM Guest Tools in Settings > Apps > Installed apps.
- If Windows says it isn't activated, follow Settings > System > Activation.
Linux
Start the VM. It gets the default (NAT) network with a new adapter, so the network interface has
a new name; desktop distros connect on their own. If a server install uses a fixed interface name
in /etc/netplan or similar, change it to the new one (ip link shows it).
macOS
Start the VM and sign in as before. It gets the default (NAT) network with a new adapter.
What is imported
| Imported | Not imported |
|---|---|
| The disks, as they are now (qcow2, ASIF or raw) | CD/DVD images and removable drives |
| Processors (up to your Mac's), memory | TPM contents (Windows sees a new TPM) |
| The distro, from the VM's icon or EFI partition (Linux) | Shared folders, USB and display settings |
| The network adapter's MAC address (Windows) | The network adapter (Linux and macOS get a new one) |
| The machine identifier and startup data (macOS, Apple Linux) | QEMU's EFI variables |
Limitations
- Only ARM64 VMs that use the hypervisor can be imported; emulated VMs can't run on Virtualization.
- QEMU VMs must start with UEFI. Linux VMs that start a kernel directly can't be imported.
- macOS VMs need the version of macOS they run, or an earlier one, on this Mac.
- A Linux VM made with QEMU needs the fallback boot loader
EFI/BOOT/BOOTAA64.EFIon its EFI partition. If it's missing, runsudo grub-install --removablein the VM in UTM, shut it down, then import it again. - Disks with snapshots, disks stored as changes to another image, and encrypted qcow2 disks can't be imported. A suspended QEMU VM keeps its state as a disk snapshot: start it in UTM and shut it down first.
- VMs made with an old version of UTM must be opened in the latest UTM once, which updates them.
- Disks must be inside the
.utm.