🖥️ Live Screen
The Live Screen shows a running VM's display on your iPhone or iPad and sends your touch and keyboard input back to it — no VNC or extra setup.
Requirements
- The CLI Server must be running on your Mac
- The VM must be running (or installing macOS)
- The VM must have a display — headless VMs are supported too
Opening the Screen
Open a running VM and tap Connect, or open a VM's live screen from a Shortcut.
Connect in Window (iPad)
On iPad, long-press Connect — or tap the ••• button next to it — on a VM row in the list, or on the VM's own details screen, and choose Connect in Window to open the live screen in its own window alongside the rest of the app. Open several VMs' screens this way to watch and control more than one at once; opening the same VM again just brings its window forward instead of duplicating it.
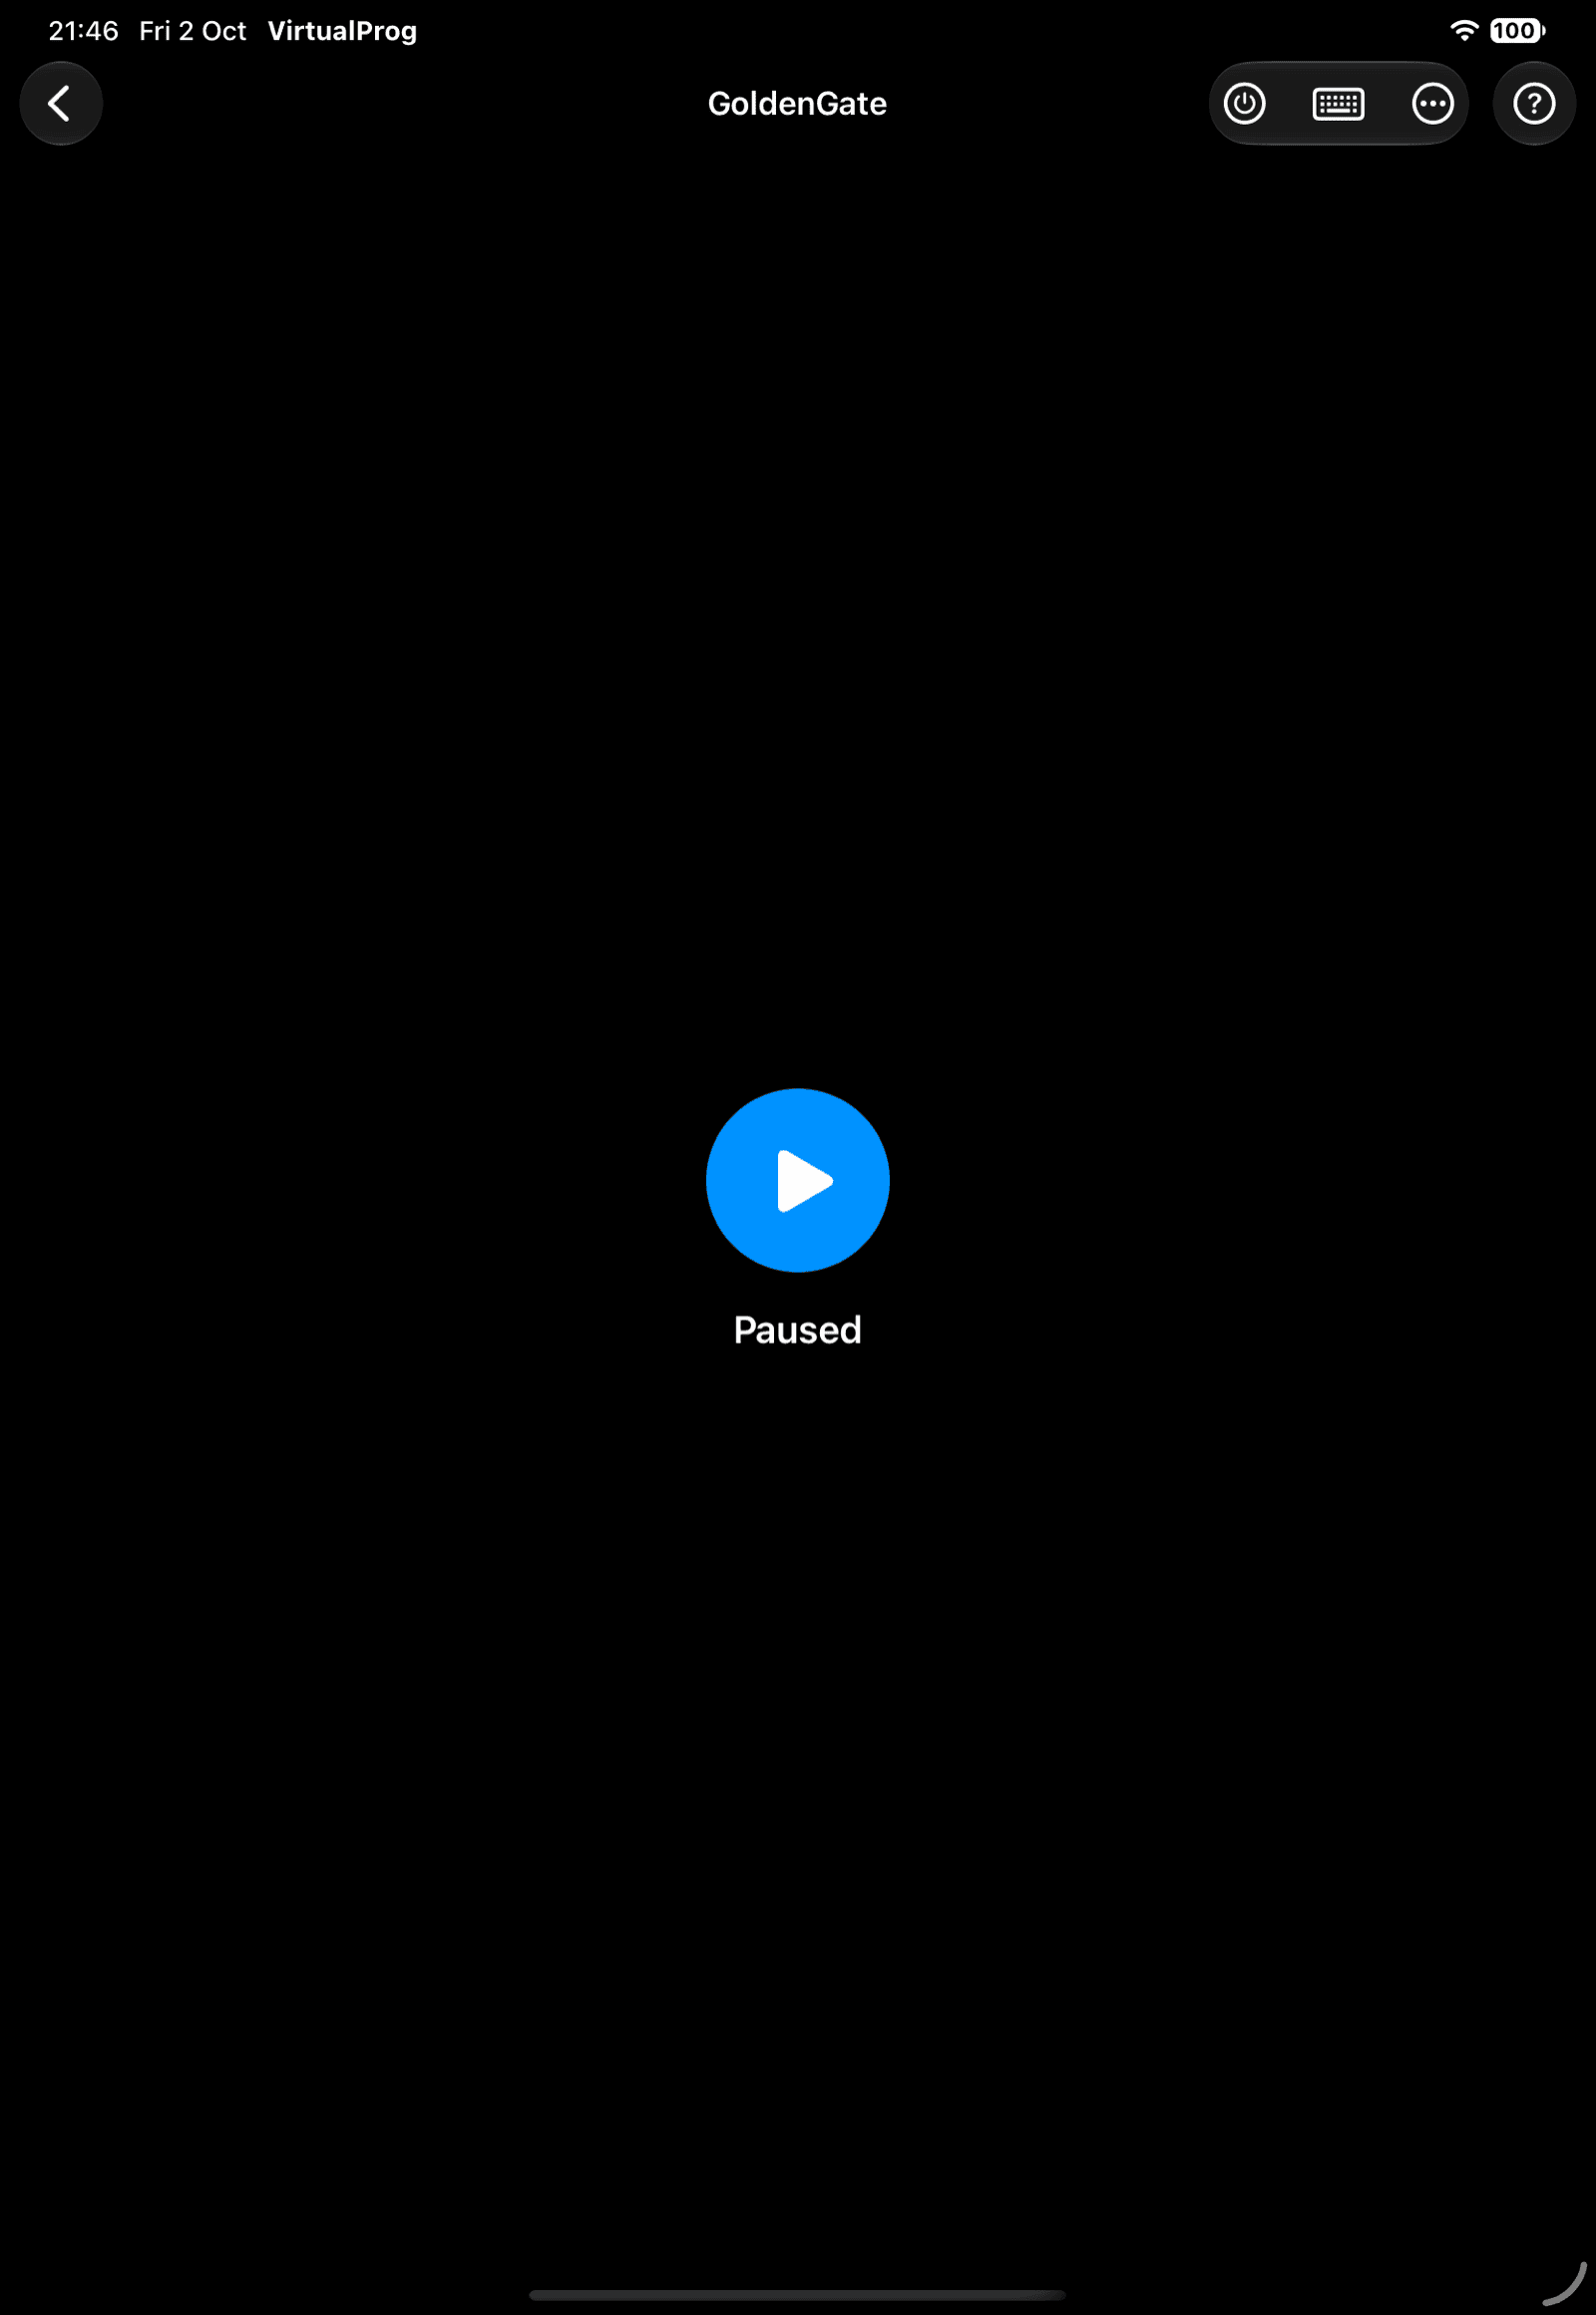
▶️ Paused, Suspended & Stopped
While the VM is Paused, Suspended, or Stopped, the Live Screen doesn't show its last picture — instead you'll see the VM's state and a big Play button in the middle of the screen. Tap it to Resume (Paused/Suspended) or Start (Stopped) the VM right from here; the picture comes back on its own as soon as it's running again.
👆 Touch Controls
The first time a picture appears, a Touch Controls card lists these gestures. Tap Got It to dismiss it; it doesn't come back.
| Gesture | Action |
|---|---|
| Tap | Click |
| Drag | Click and drag |
| Long press | Right-click |
| Two-finger pinch | Zoom in or out |
| Two-finger drag | Move around when zoomed |
| Two-finger double-tap | Switch between zoom-to-fit and actual size (the same local zoom as ••• → Display) |
| Three-finger drag | Scroll inside the VM |
A hardware keyboard works directly. On screen, tap the keyboard button to show or hide the keyboard. If your keyboard has a trackpad (or you have a Bluetooth mouse connected), its two-finger scroll or scroll wheel also scrolls inside the VM — no need to lift onto the screen for three fingers.
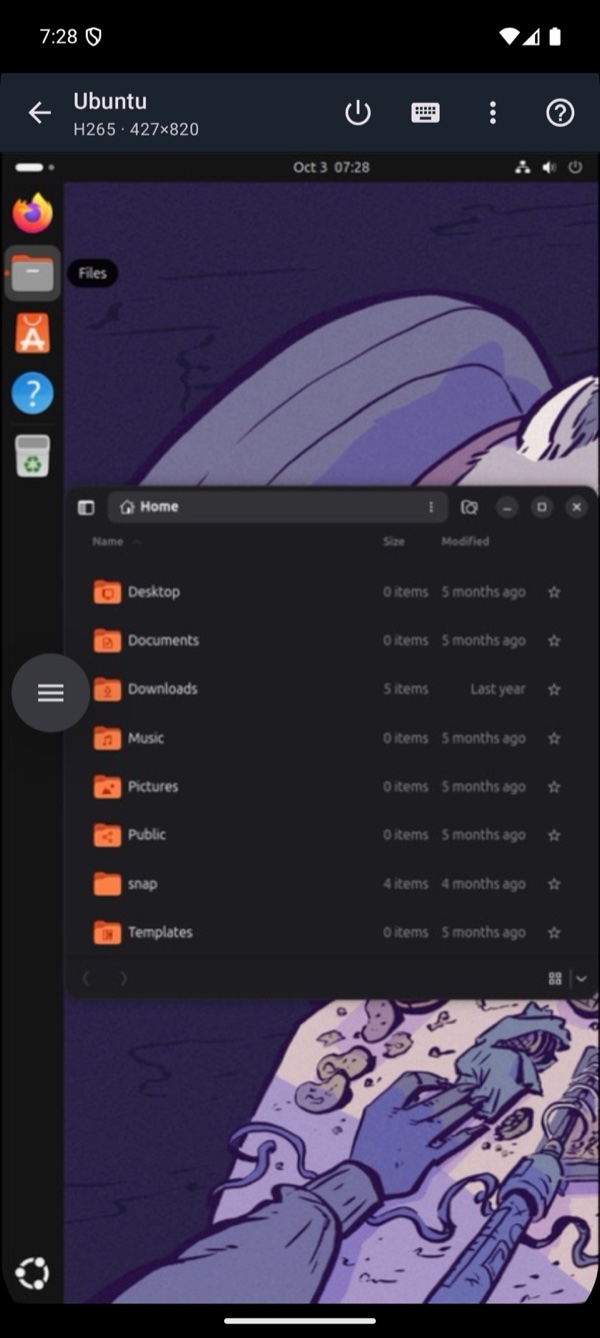
Android: the touch gestures are the same. A connected mouse, trackpad or stylus also works: moving it moves the VM's pointer, and its scroll wheel or two-finger scroll scrolls inside the VM. Pinch zooms around your fingers. The screen stays awake while you watch.
🧰 Toolbar
The toolbar stays to just four buttons no matter the VM's state, with everything else tucked under ••• so it's never crowded on an iPhone:
| Button | Action |
|---|---|
| Power | Start, Pause, Resume, Restart, Suspend (Apple Silicon only), Shutdown or Stop — see below |
| Keyboard | Show or hide the on-screen keyboard |
| ••• | USB, Memory Balloon, Special Keys, Save Screenshot, Serial Ports, SSH Terminal, Display, and Stream Settings — see below |
| Help | Context-aware help for this screen |
The screen reconnects automatically after a network interruption.
⏯️ Power
Tap Power for the same controls you'd otherwise have to leave the screen to reach — the options shown depend on the VM's current state, same as the VM list and details screen:
| State | Available controls |
|---|---|
| Stopped | Start |
| Running | Pause, Restart, Suspend (Apple Silicon only), Shutdown, Stop |
| Paused / Suspended | Resume, Stop |
| Installing | Stop (force-stops the installation) |
⌨️ Special Keys
Tap ••• → Special Keys for a slim bar across the top of the screen with keys a software keyboard can't send on its own — Ctrl+Alt+Delete, Escape, Tab, the function keys, arrows, and more, each row scrolling sideways so the bar stays short. It adapts to the VM's guest OS: macOS VMs get Mac shortcuts like ⌘ Space and ⌘ Tab, while Linux VMs get Ctrl/Alt combinations like Ctrl+Alt+Del and Alt+Tab instead. Tap the X to dismiss it.
📷 Save Screenshot
Tap ••• → Save Screenshot for a full-quality PNG of the VM's current picture, shared through the system share sheet — on iOS: Save to Photos, AirDrop, or share it anywhere else; on Android: Share to Drive, Messages, email or any other app. Only available while connected with the master token, since the screenshot endpoint doesn't accept a scoped/operator token.
🔌 Serial Ports & SSH Terminal
Tap ••• for the same Serial Console and SSH connections available from VM Details, without leaving the screen:
- If the VM has serial ports configured, each one is listed by name — a Console-mode port only works while the VM is running, while a File-mode port works even while it's stopped.
- SSH Terminal is always listed, enabled while the VM is running.
Both open over the screen and dismiss back to it when done — unlike VM Details' own rows, this does not open a separate window on iPad.
Android: the same two destinations are listed directly under ⋮, right below Special Keys.
🖼️ Display
Tap ••• → Display for everything related to how the picture fits the screen:
| Option | Action |
|---|---|
| Resolution… | Pick a preset resolution for the guest to switch to |
| Fit to Screen | Keep resizing the guest's own resolution to match this screen, including after rotating or resizing the window on iPad |
| Zoom to Fit / Actual Size | The local zoom toggle — same as the two-finger double-tap gesture above |
Resolution… and Fit to Screen only appear for a VM whose Display setting is Auto Resolution (set on the Mac, in that VM's configuration) and only while it's running — a VM set to a fixed/forced resolution can't be resized this way. Unlike the local zoom toggle, both of these change the guest's own resolution rather than just scaling the picture, so there's no blurriness or letterboxing once applied.
For Windows 11 VMs, Resolution… and Fit to Screen need the display driver and the VioGpu Resolution Service installed in Windows — see Install the Resize Service.
📡 Stream Settings
Tap ••• → Stream Settings for:
| Setting | Description |
|---|---|
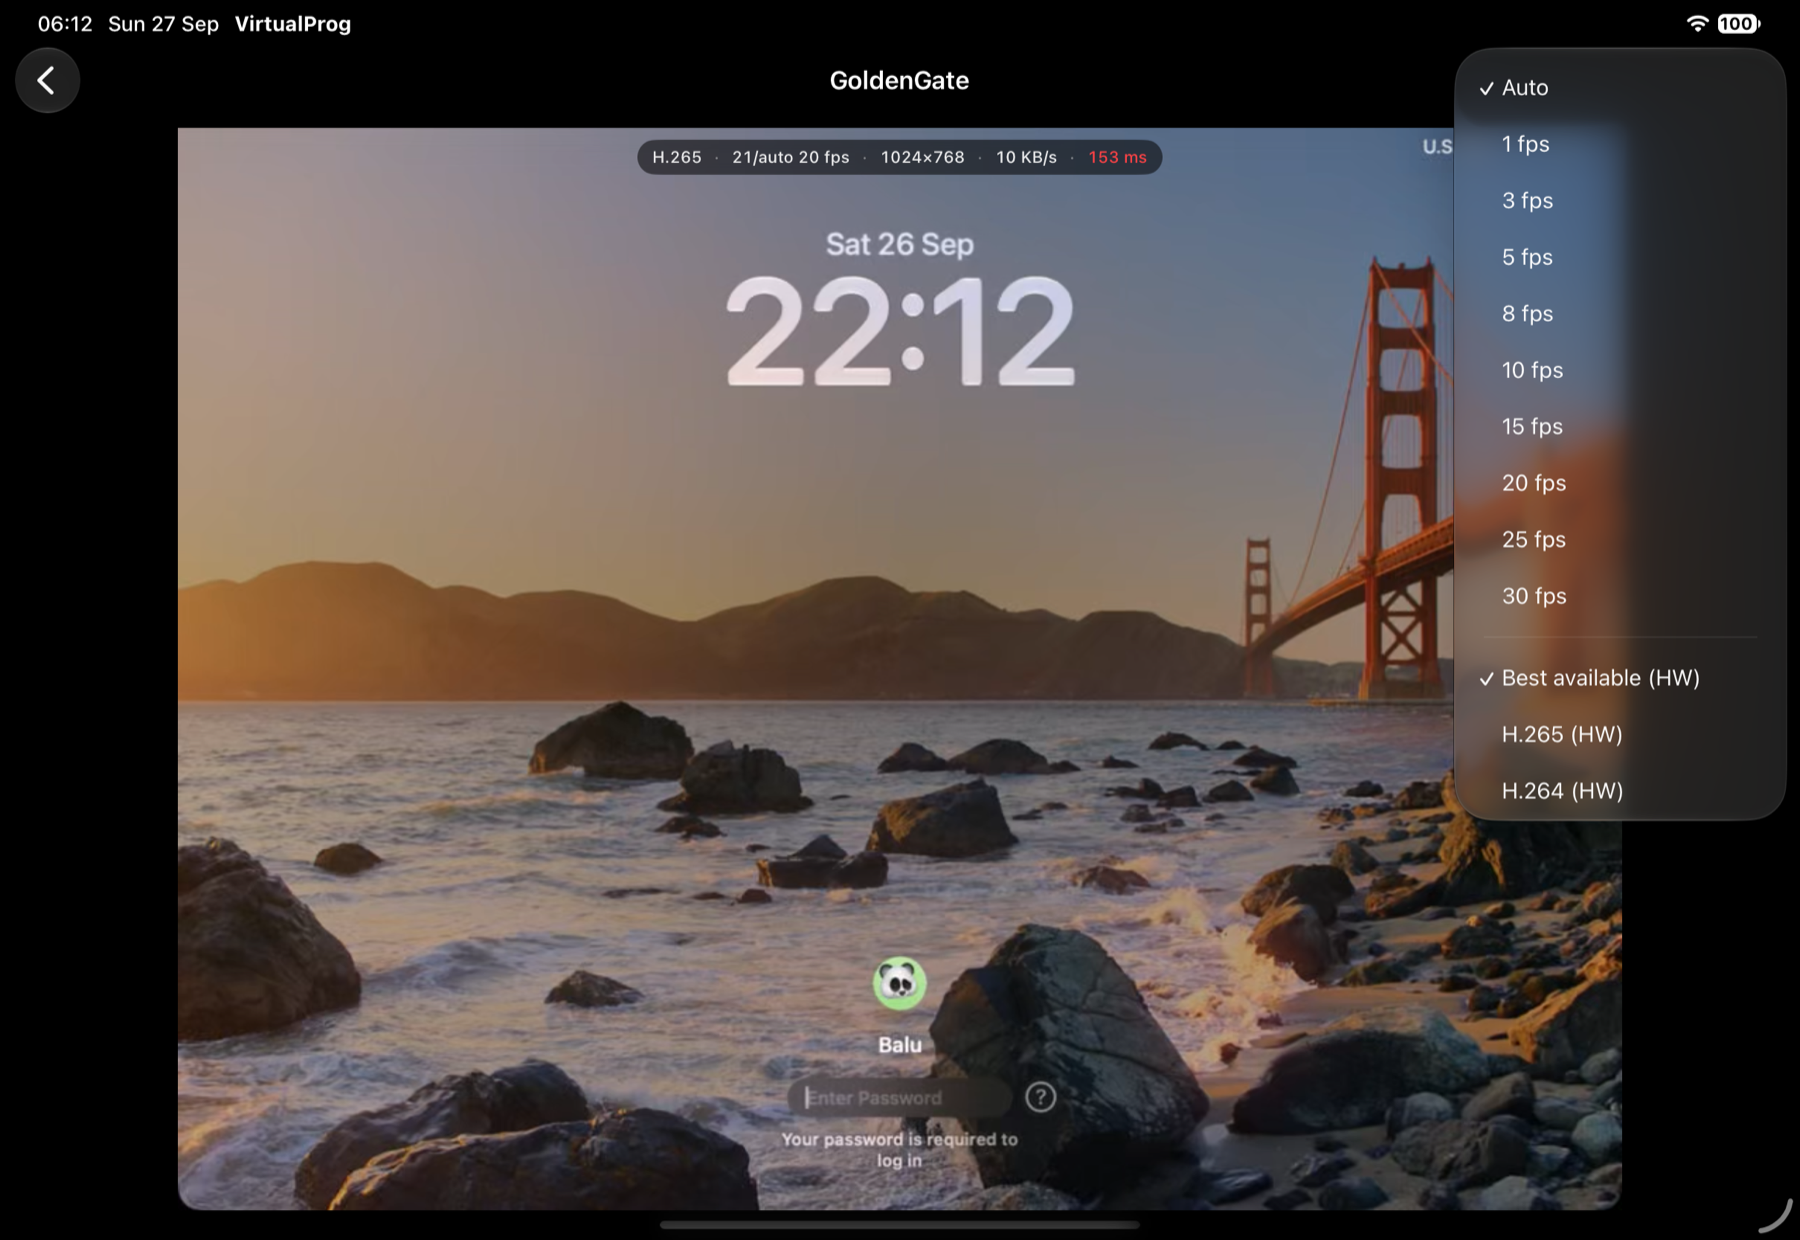
| Frame Rate | Auto adapts to your connection. Fixed rates: 1, 3, 5, 8, 10, 15, 20, 25 and 30 fps |
| Quality | Best available (HW) uses hardware video when the Mac offers it. Also H.265 (HW), H.264 (HW), Best (PNG) and High / Medium / Low (JPEG) |
| Show Stream Info | A bar at the top with the codec, frame rate, resolution, throughput and latency |
| Request a Fresh Frame | Ask the Mac to resend a full frame right away |
Tip: Leave Frame Rate on Auto and Quality on Best available (HW). Hardware H.265 is the smoothest option with the lowest bandwidth. Use JPEG only if hardware video is unavailable.
Your choices become the new defaults, which you can also set in Settings.
🔌 USB Devices
Attach a USB device connected to your Mac to the running VM.
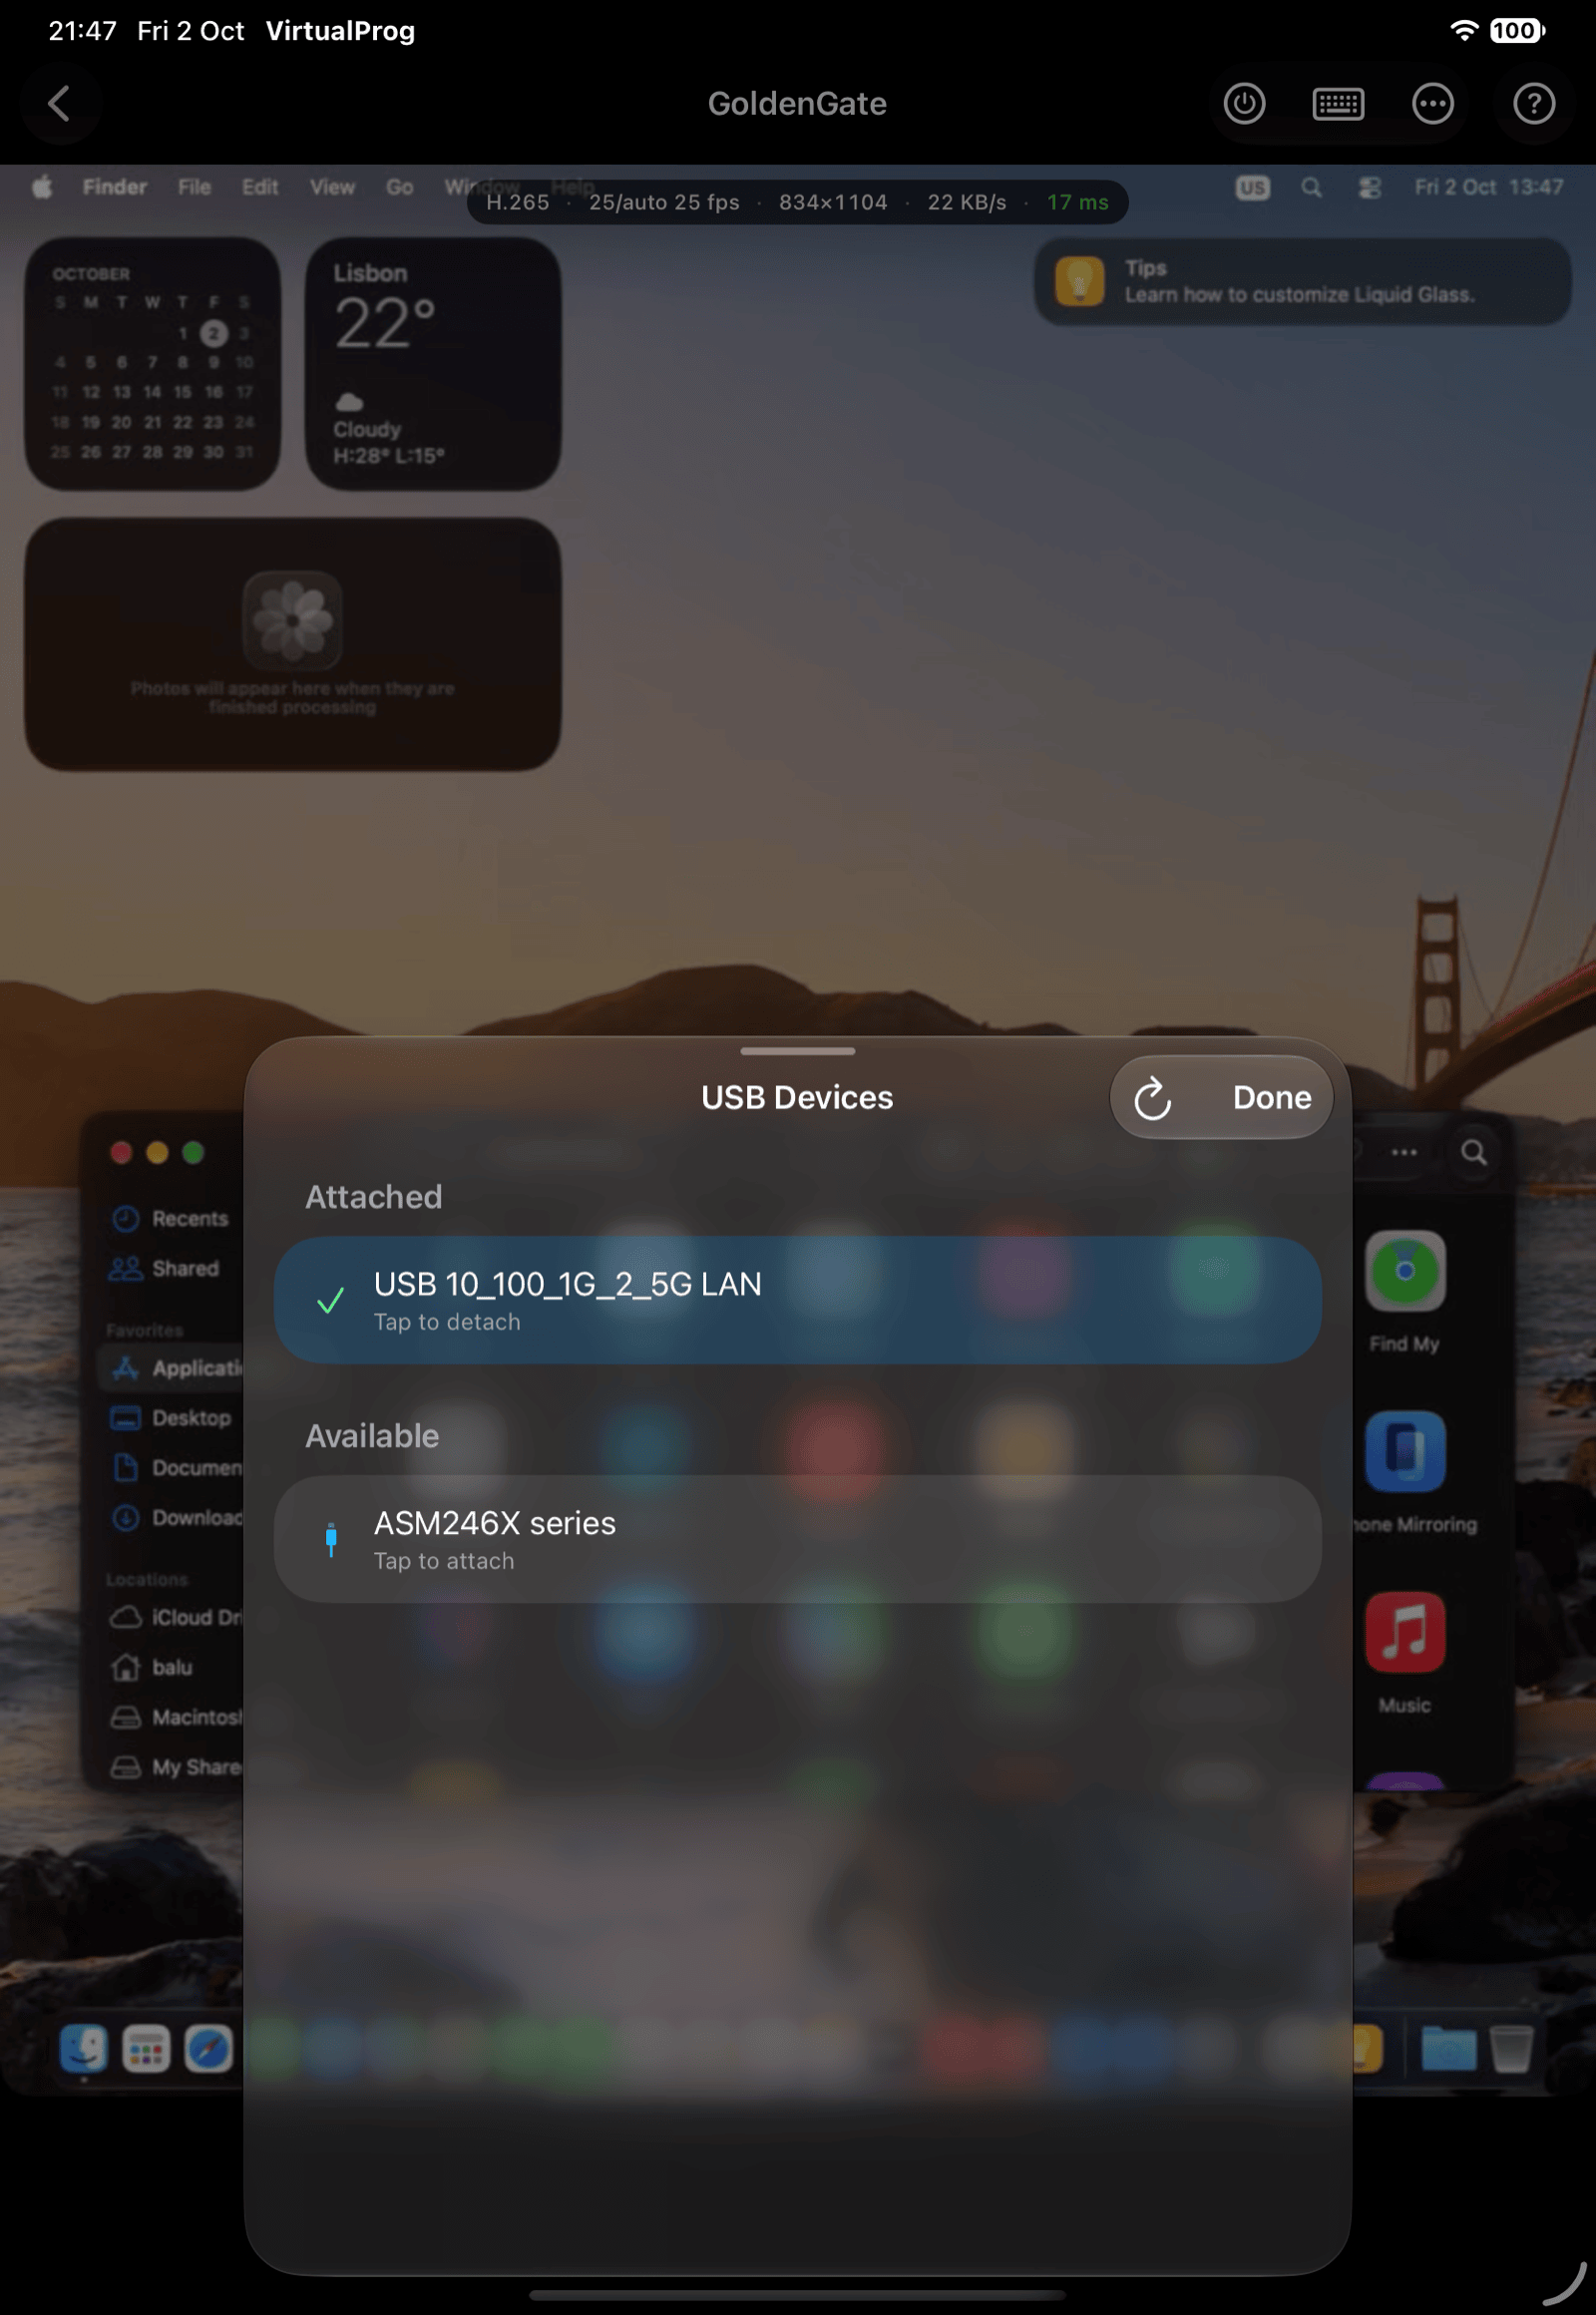
- Tap ••• → USB Devices (also available in the VM details)
- Tap a device under Available to attach it
- Tap a device under Attached to detach it
After detaching, the device returns to Available within a few seconds. Devices used by another VM appear under In Use by Other VMs.
Note: USB passthrough requires a macOS 27+ Mac and a running VM.
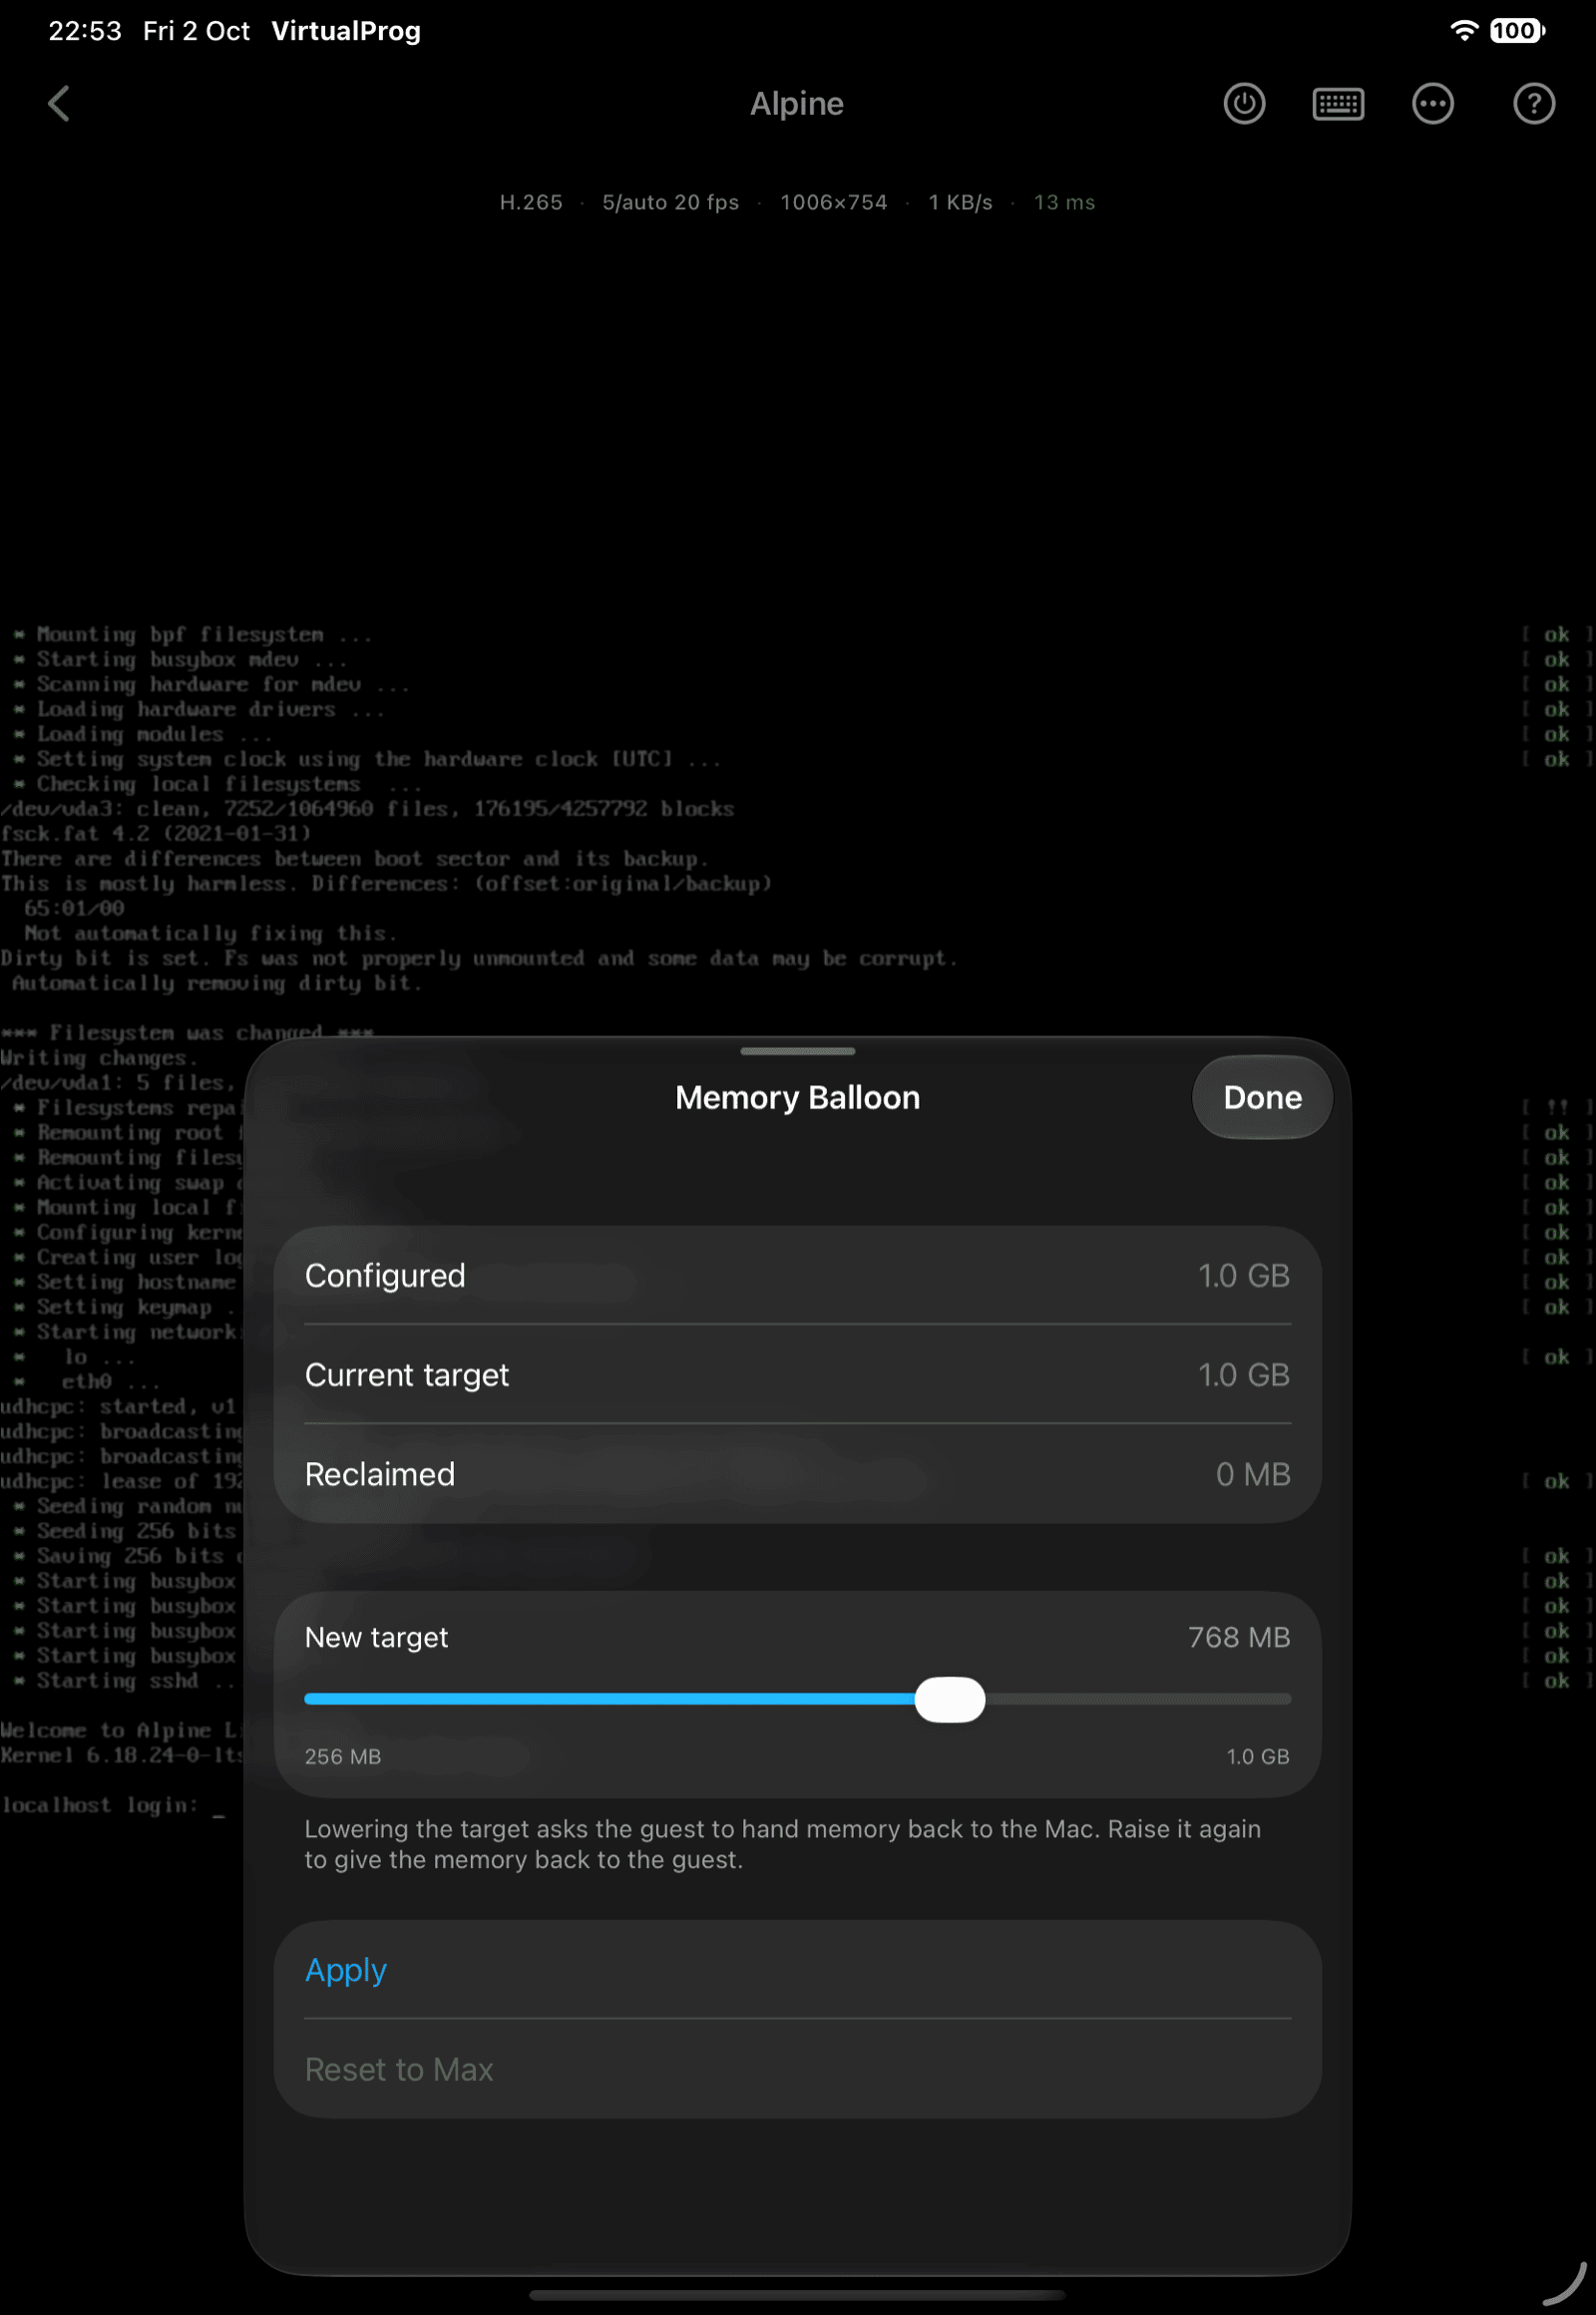
🎚️ Memory Balloon
For a VM with a memory balloon, ••• → Memory Balloon lets you lower the memory it holds and hand the rest back to your Mac. Move the slider (256 MB up to the configured memory, in 64 MB steps) and tap Apply; Reset to Max restores it. The guest may not release everything at once.